The widget is a script tag. But maybe a script tag isn't your shape: you're building a kiosk, an in-app help screen with your own UI, or you want to wire support into something we've never heard of. The same REST API the widget speaks is open to you, and it takes about fifteen minutes to go from zero to a message sitting in your dashboard, plus a webhook telling your server what happened.
Here's the plan: grab a credential, open a conversation with two curl calls, watch the message land in the workbench, then set up a webhook and verify its signature. Nothing to deploy until the webhook part, and even that is twenty lines of Node.
What you need (and what you don't)
Go to Applications, pick your app, and open the Embed tab of its settings. Two cards live there:
- The green one, App ID · public identifier, marked "Safe to share." This is the only credential today's tutorial needs. Click Copy App ID.
- The red one, Secret Key · server-side secret. You don't need it here. The visitor API hands you a scoped JWT instead, so the Secret Key stays where the card says it should: server-side only, in environment variables or a secret manager.
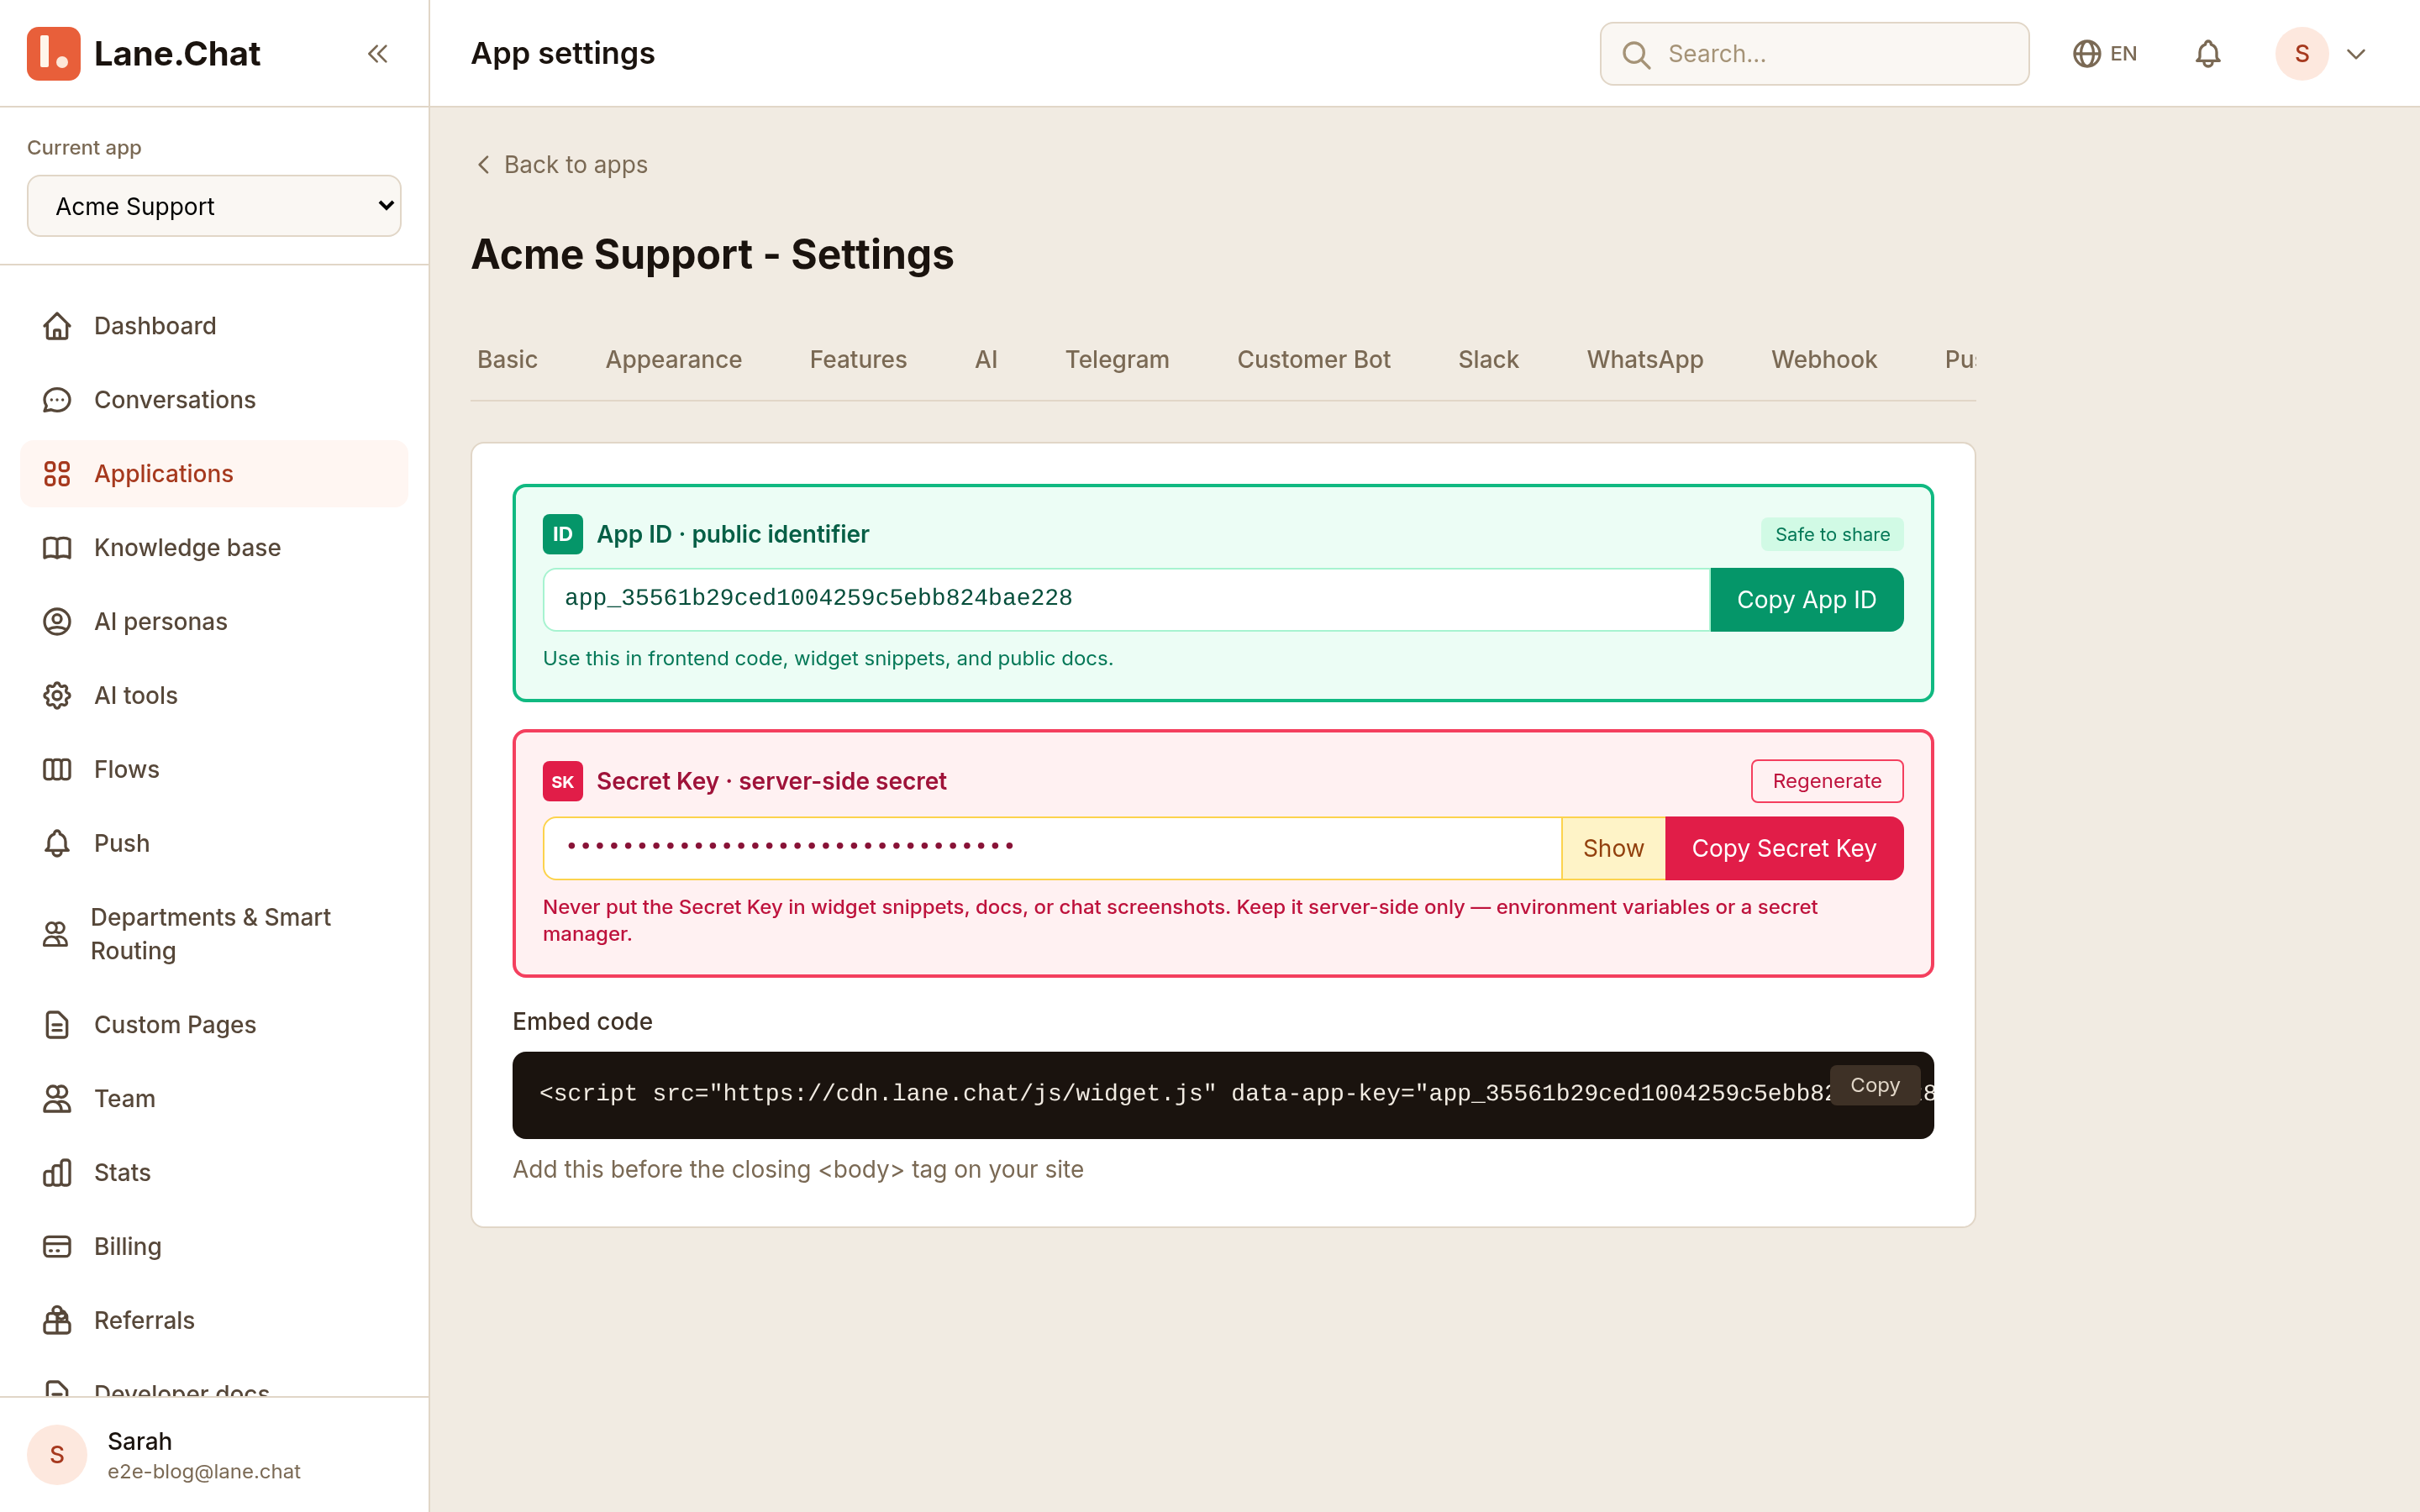
That split matters more than it looks. Everything below runs on a public identifier plus a token minted per visitor. You could ship this code in a mobile app without leaking anything.
Step 1: Open a conversation
One POST creates (or resumes) a conversation and returns a token:
curl -X POST https://api.lane.chat/v1/chat \
  -H "Content-Type: application/json" \
  -d '{
    "appId": "app_YOUR_APP_ID",
    "visitor_uuid": "9f2c6a3e-your-stable-uuid",
    "fingerprint": "device-fingerprint-string"
  }'
The response:
{
  "code": 0,
  "data": {
    "chatId": 99915292,
    "clientId": 99890391,
    "token": "eyJhbGciOi...",
    "visitor_uuid": "9f2c6a3e-...",
    "appConfig": { ... }
  }
}
Two fields deserve a sentence each. visitor_uuid is a stable ID you generate once per visitor and store; fingerprint is a device fingerprint string. When both match an existing visitor, you get their conversation back instead of a new one. One anchor alone isn't enough, which is what keeps a copied UUID from hijacking someone's history. The endpoint allows 30 calls per 60 seconds, so cache the token instead of re-opening on every message.
Step 2: Send the message
The token goes in the Authorization header:
curl -X POST https://api.lane.chat/v1/send-message \
  -H "Authorization: Bearer eyJhbGciOi..." \
  -H "Content-Type: application/json" \
  -d '{
    "chatId": 99915292,
    "text": "Update on order #48213: your Ridgeline 38L Pack shipped today. Tracking: 1Z999AA10123456784 (UPS Ground, ETA Thursday)."
  }'
Back comes {"code":0,"msg":"success","data":{"messageId":…,"timestamp":"…"}}. Besides text you can pass attachment (a string; at least one of the two is required), reply_to_id to thread onto an earlier message, and a metadata object for anything you want to carry along. Rate limit: 60 per 60 seconds.
One thing to be clear-eyed about: this is the visitor-side API. The server stamps every message it accepts as coming from the visitor, no matter what your payload says. So it's the right tool for building your own chat front end, and the wrong tool for pushing agent replies. Those come from the dashboard, from AI, or from flows.
Step 3: See it land
Open Conversations in the dashboard. Your message is there, in the visitor column of the thread, and any agent who was online got it over the live connection the moment you sent it.
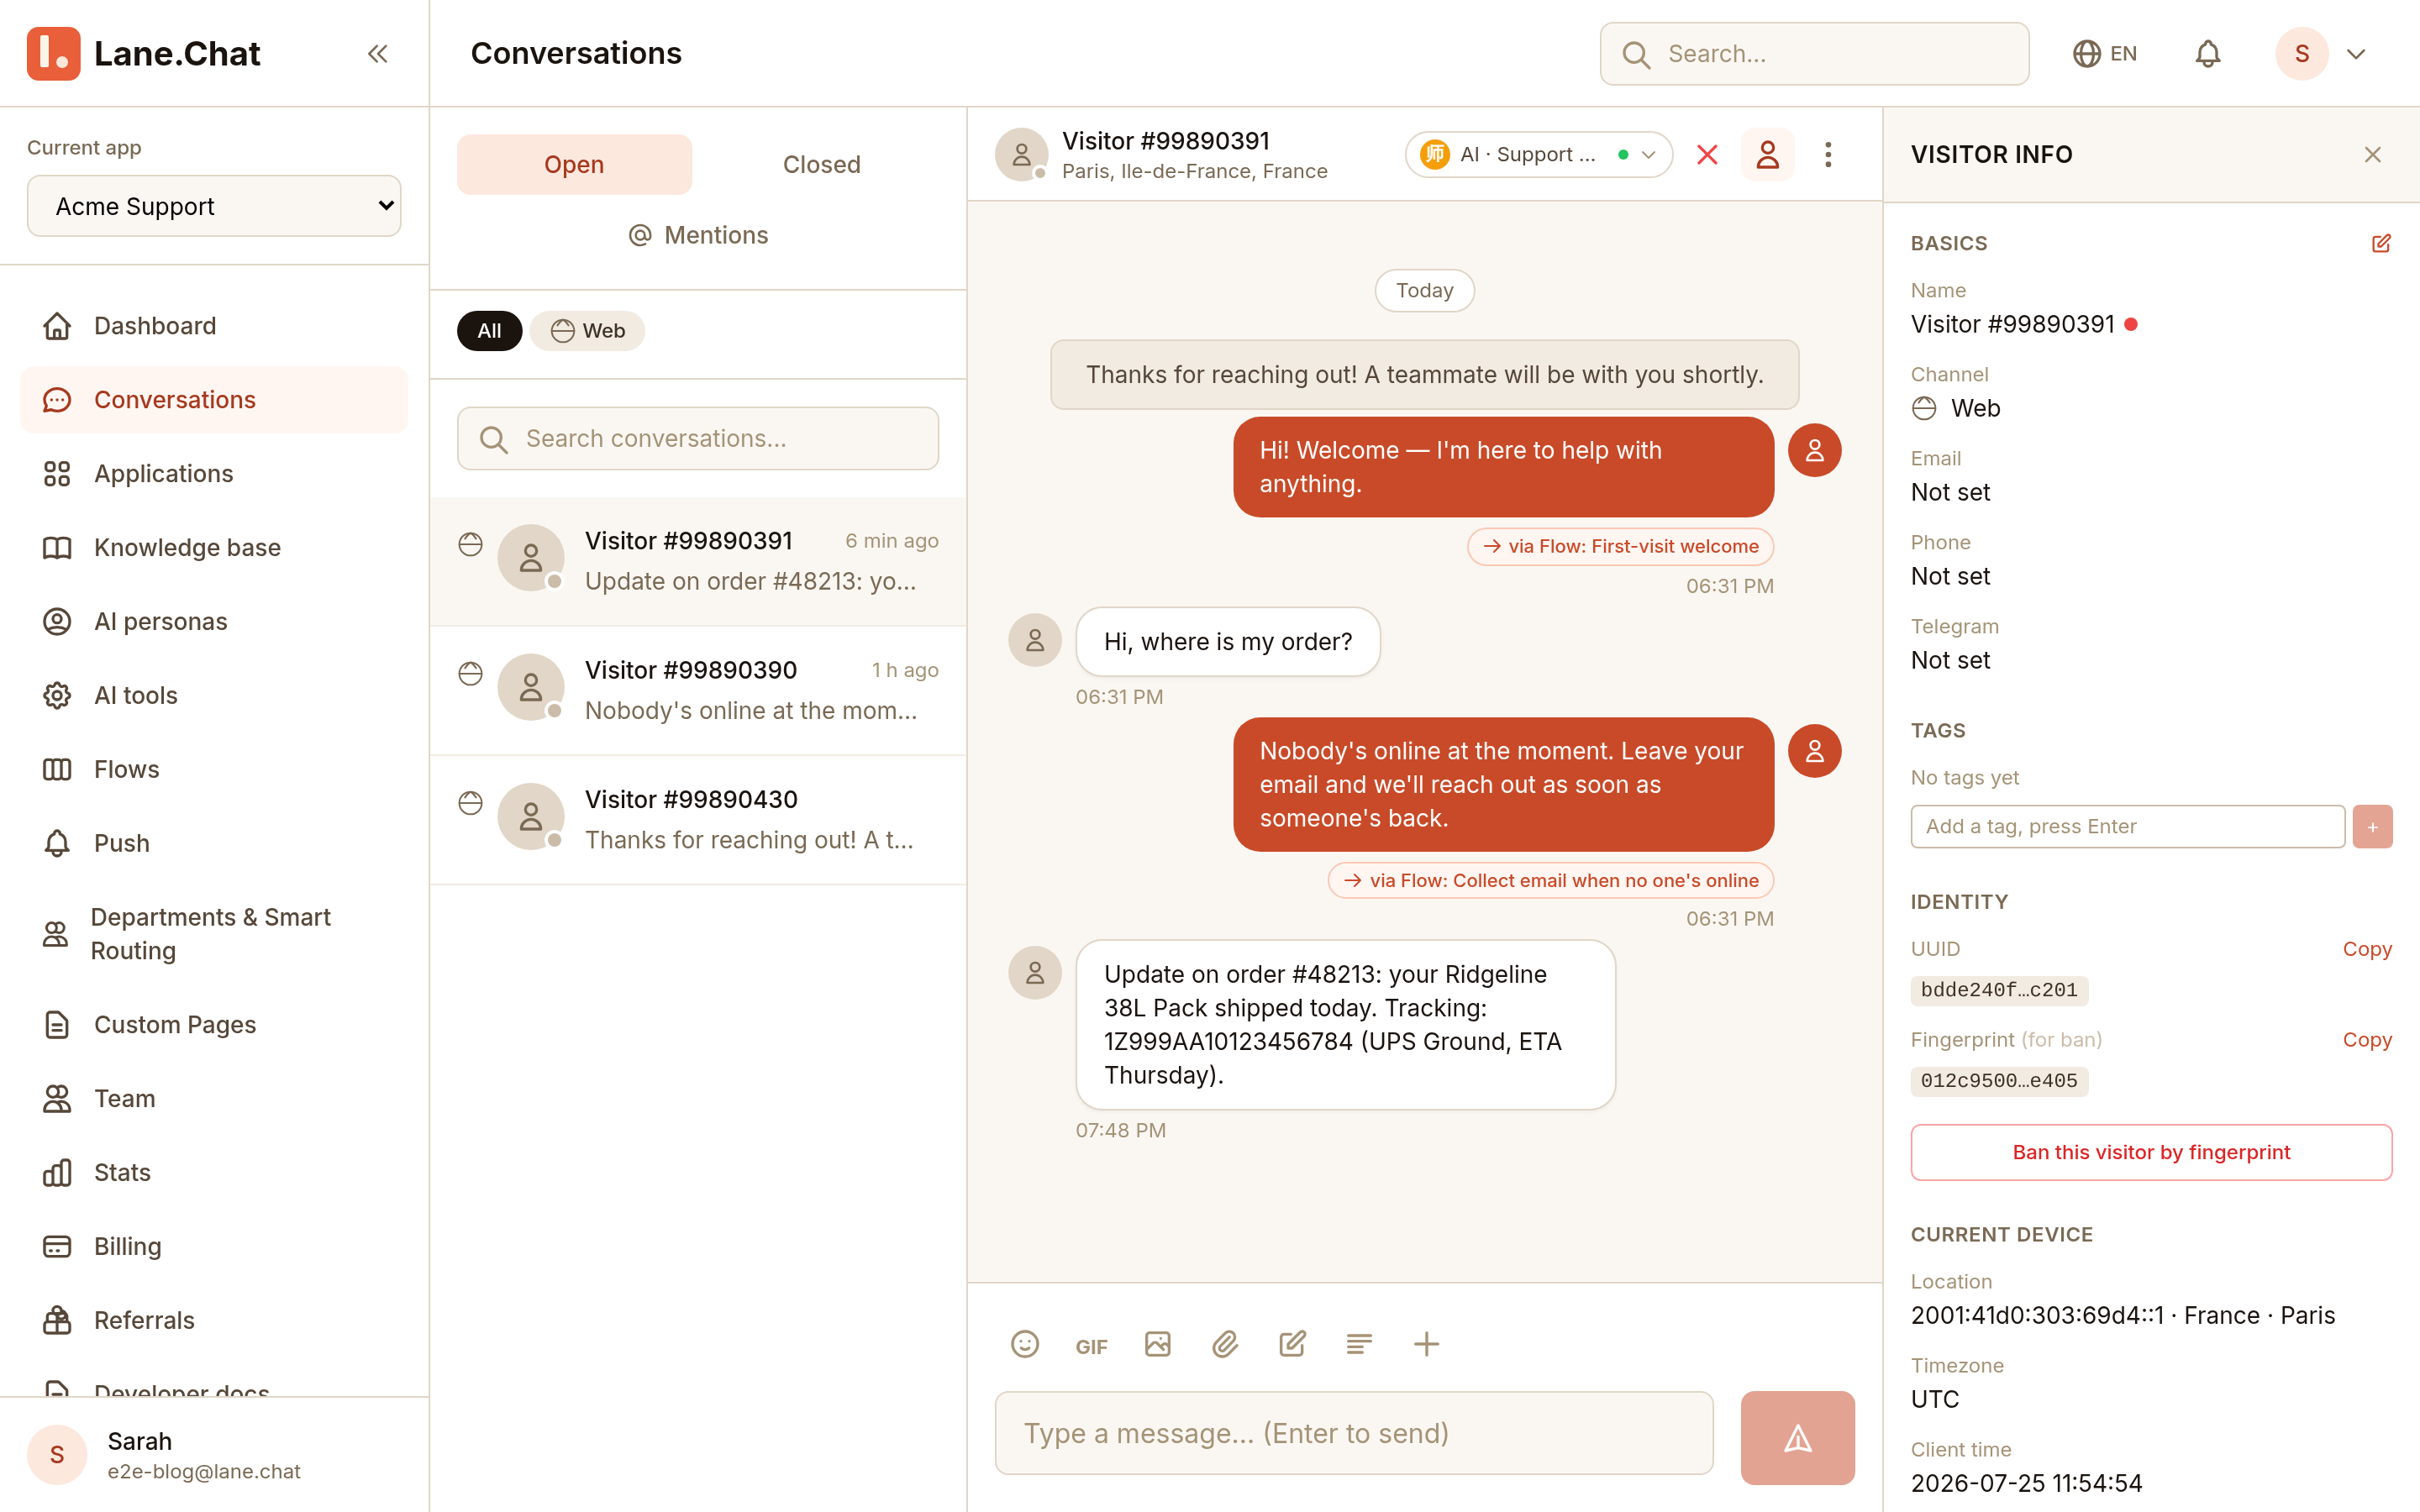
Rounding out the read side: GET /v1/load-messages pulls history with the same token, and POST /v1/upload (10 per 60 seconds) handles files.
Step 4: Point a webhook at your server
Sending is half a conversation. To hear what happens next (an agent replies, the AI answers, the chat closes), you want webhooks. Same settings page, Webhook tab:
- Webhook URL: must be https. There's a Test button right next to the field.
- Signing secret: click Regenerate to mint one, copy it, and note the toast: "New secret generated — click Save settings to apply." Nothing is live until you save.
- Event subscriptions: a checkbox grid. For a first pass,
message.received,message.ai_response,chat.started, andchat.endedcover the interesting moments. There are more (message.sent,chat.assigned,client.online,client.offlineamong them), but start small and widen later.
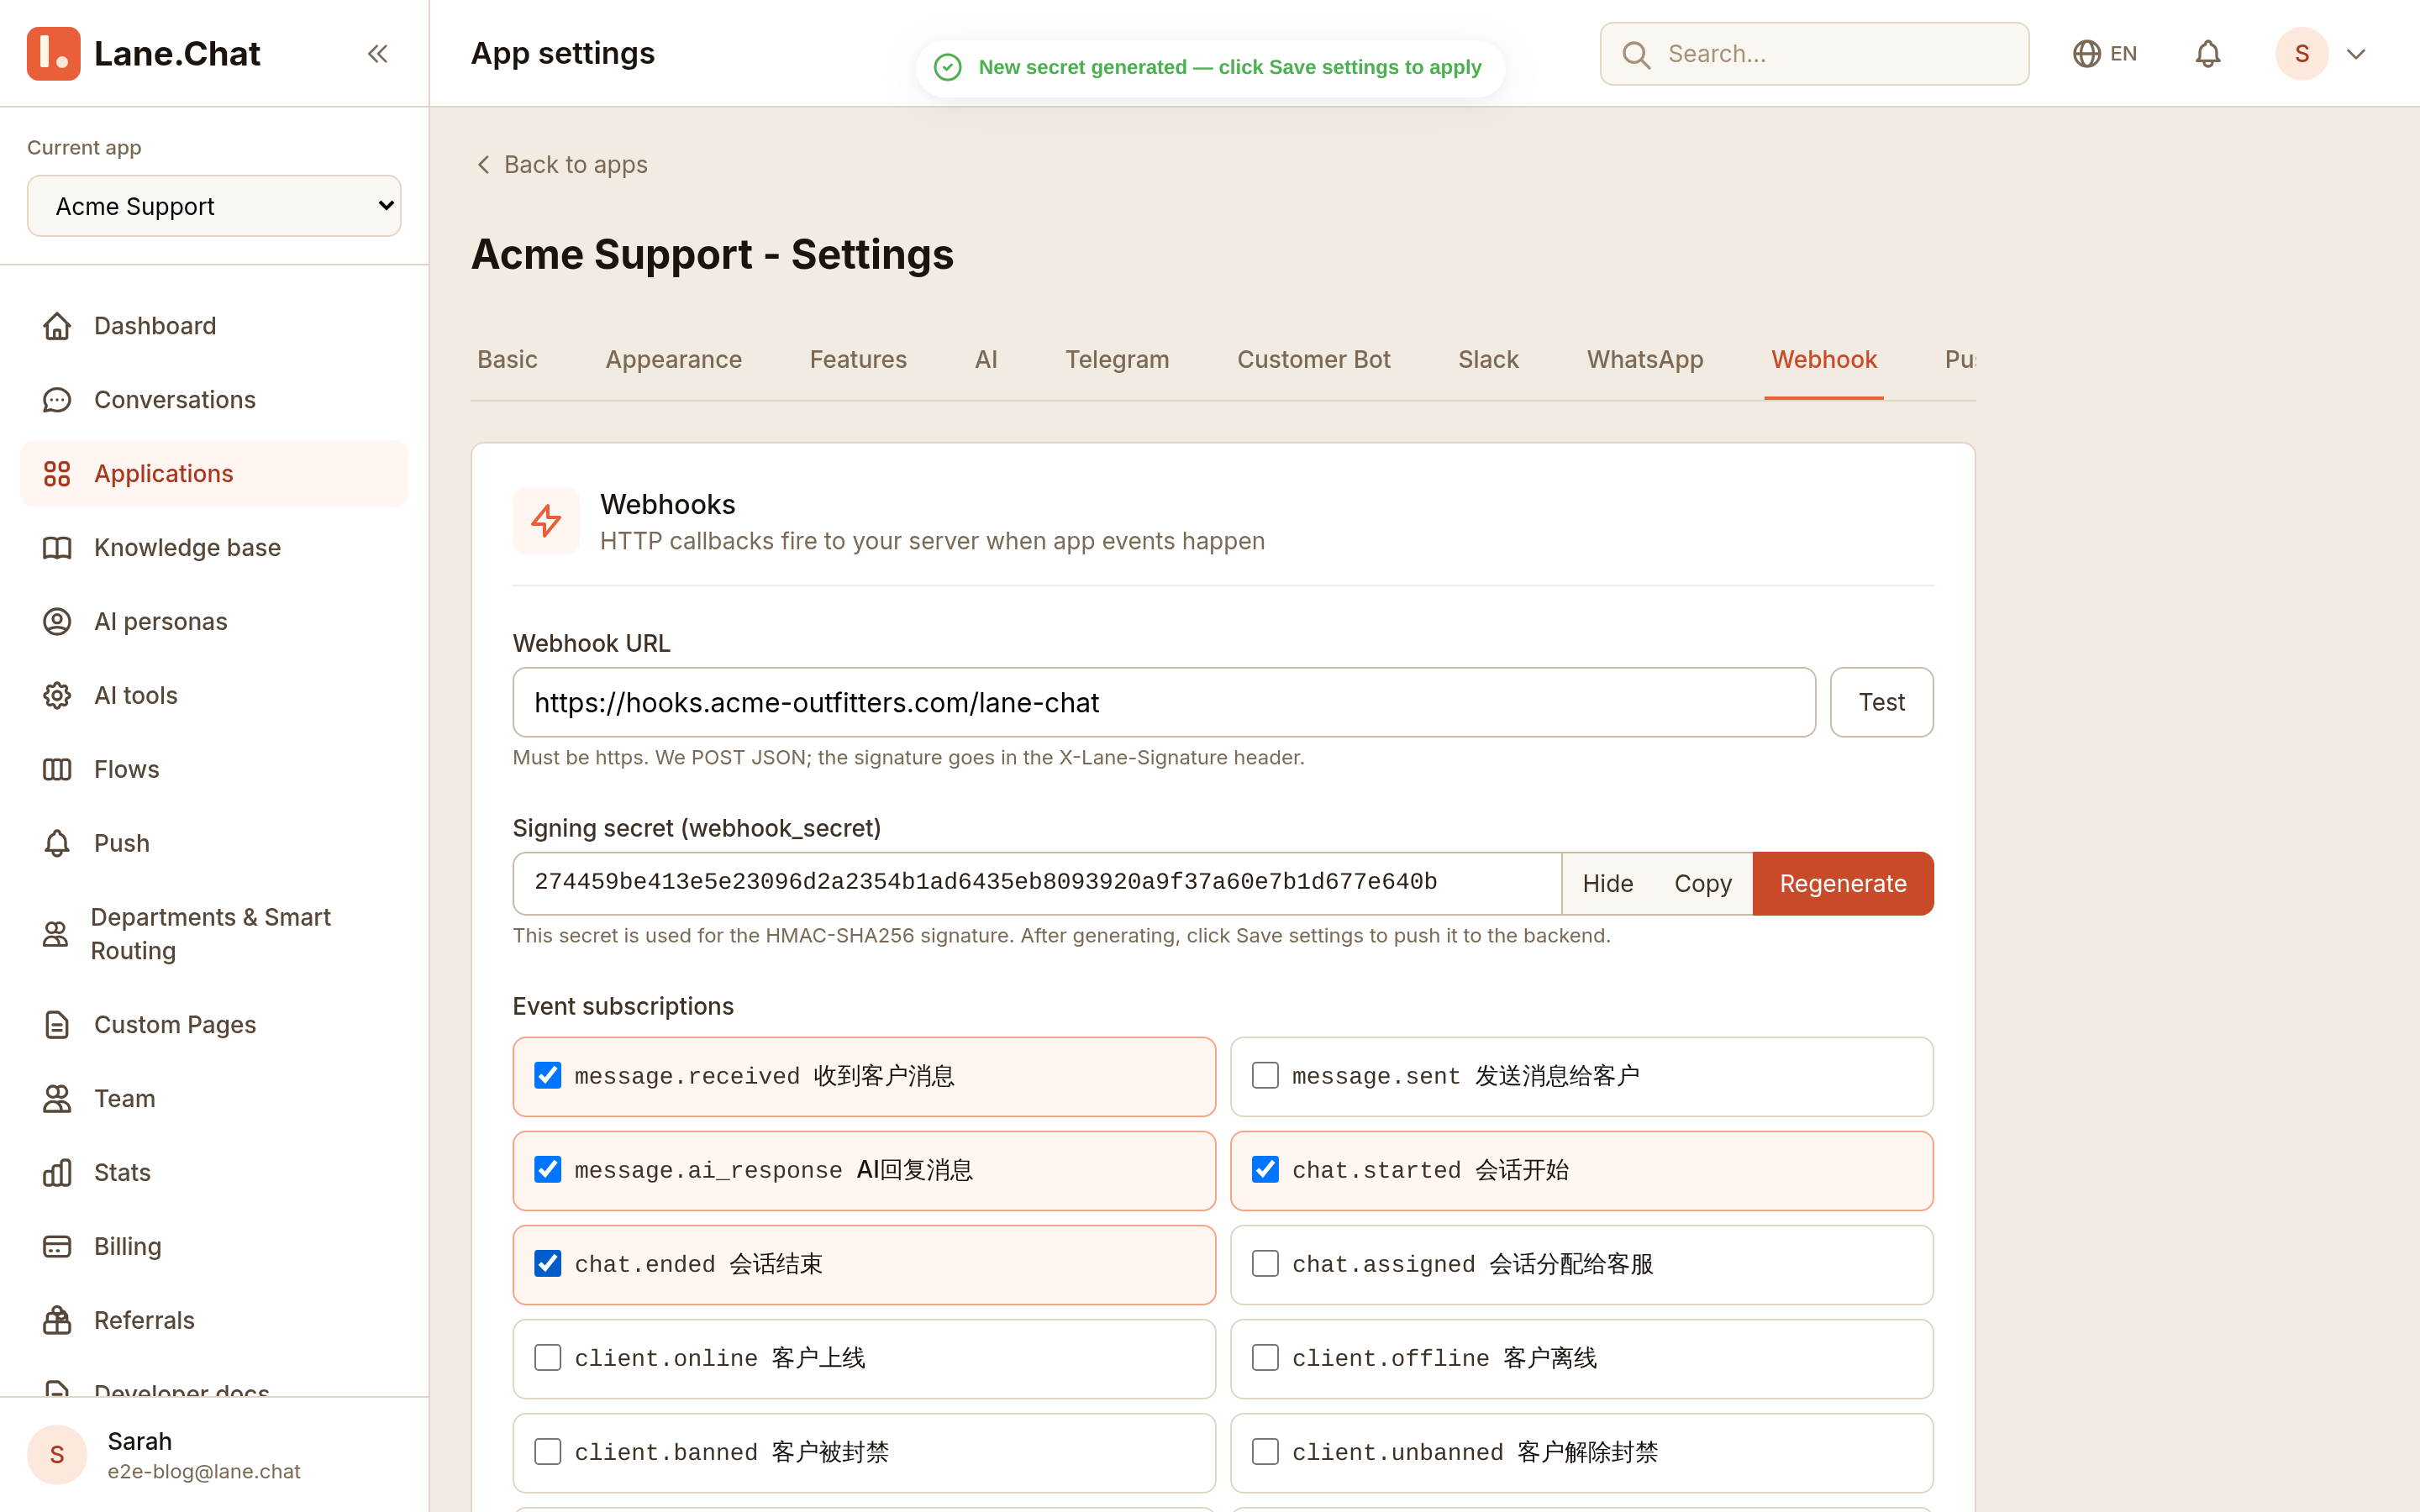
Every delivery is a POST with Content-Type: application/json and User-Agent: LaneChat-Webhook/1.0, shaped like:
{
  "event": "message.received",
  "app_id": 2000000121,
  "app_pub": "app_YOUR_APP_ID",
  "timestamp": 1753430000,
  "data": { ... }
}
The Test button sends {"event":"test","timestamp":…,"message":"This is a test webhook from LaneChat"} — handy for confirming your endpoint answers before real traffic does.
Step 5: Verify the signature
Each request carries an HMAC in the X-Webhook-Signature header: SHA-256 over the raw JSON body, keyed with your signing secret, hex-encoded. Twenty lines of Express:
const crypto = require('crypto');
const express = require('express');
const app = express();

app.post('/webhooks/lanechat',
  express.raw({ type: 'application/json' }),
  (req, res) => {
    const expected = crypto
      .createHmac('sha256', process.env.LANE_WEBHOOK_SECRET)
      .update(req.body) // the raw body, before any parsing
      .digest('hex');

    if (req.headers['x-webhook-signature'] !== expected) {
      return res.sendStatus(401);
    }

    const event = JSON.parse(req.body);
    console.log(event.event, event.data);
    res.sendStatus(200);
  });

app.listen(3000);
The classic mistake is computing the HMAC over a re-serialized body: JSON.parse followed by JSON.stringify reorders nothing in theory and everything in practice. Sign the raw bytes.
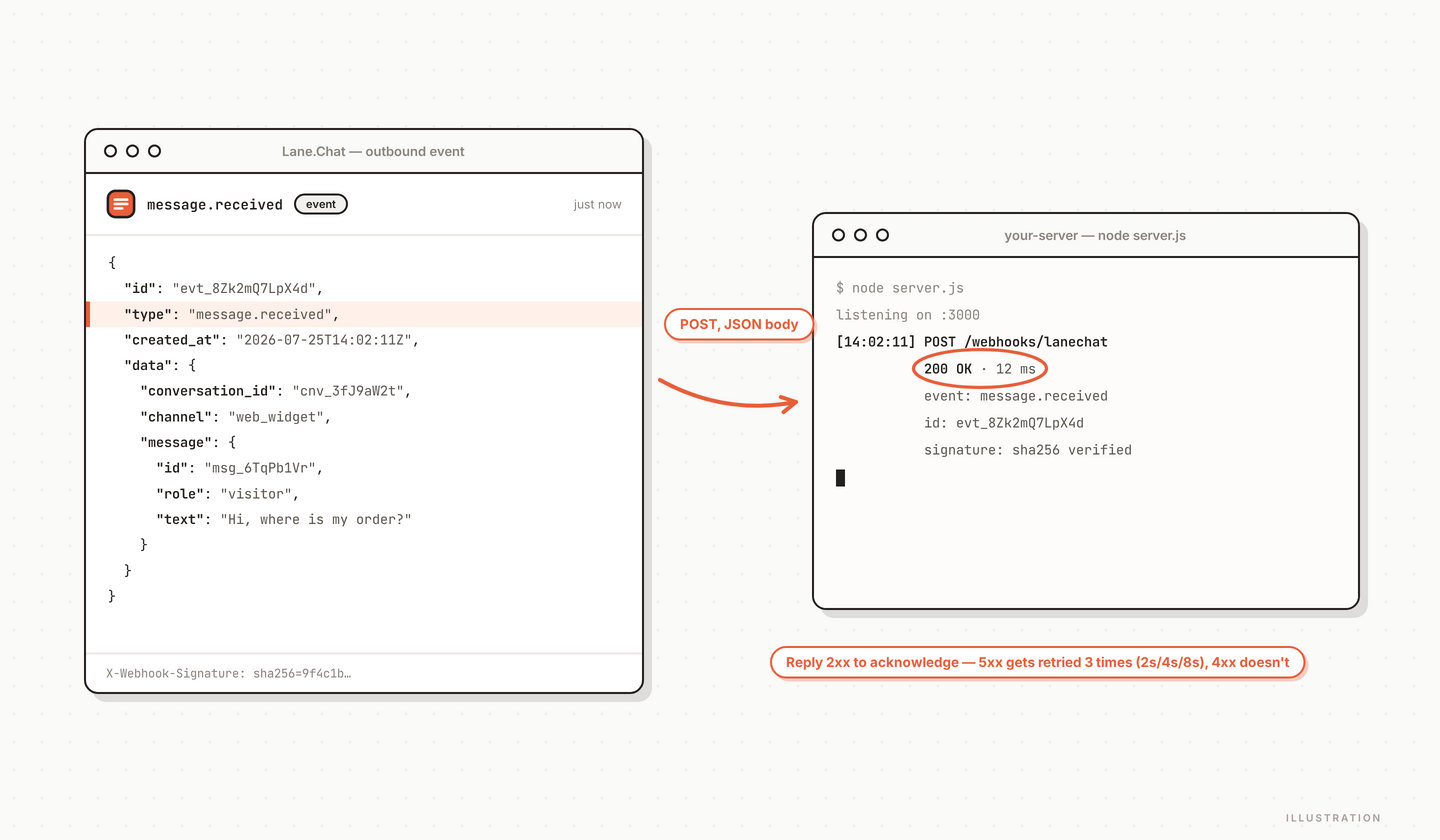
What happens when your server is down
Delivery rules, so you can design for them: a 2xx response counts as delivered. A 4xx means Lane.Chat assumes the problem is permanent (wrong route, failed auth) and does not retry. A 5xx or a network error gets retried up to three times, at 2, 4, then 8 seconds. Every attempt is logged, so a misbehaving endpoint leaves a paper trail instead of a mystery.
The practical consequence: answer 200 fast and process async. If your handler does heavy work inline and times out, you'll eat retries and process the same event twice. Ack first, work later.
That closes the loop — any code that can speak HTTPS can put words into a conversation, and your server hears back within seconds when the other side responds.