Cloud API setup has more moving parts than Telegram. Seven steps, roughly 15-20 minutes if nothing gets stuck in Meta review.
Step 1: Create a Meta App
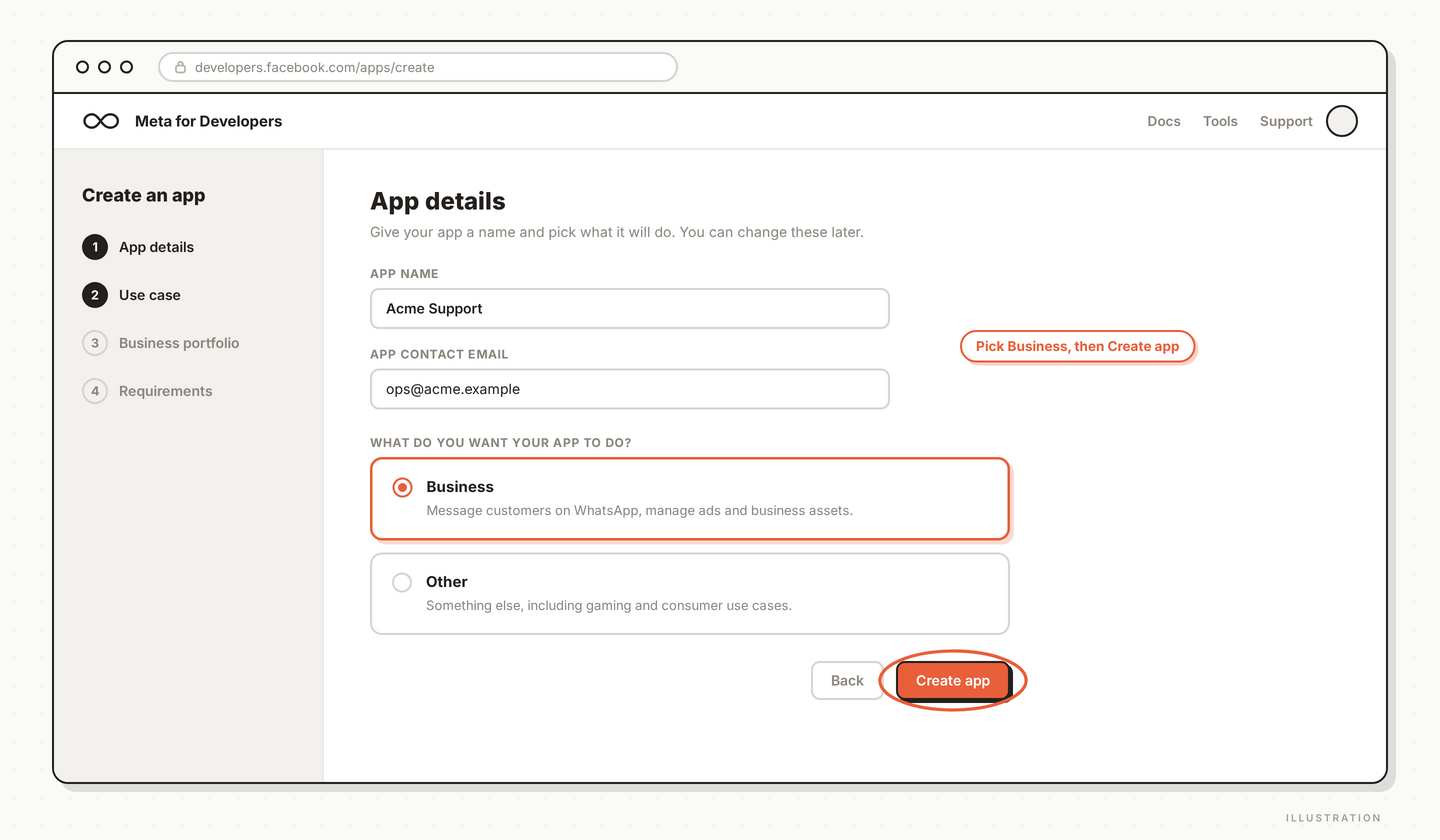
Go to developers.facebook.com → My Apps → Create App. Pick "Business" as the app type. Name it something internal-friendly like YourBrand Support.
Step 2: Add the WhatsApp product
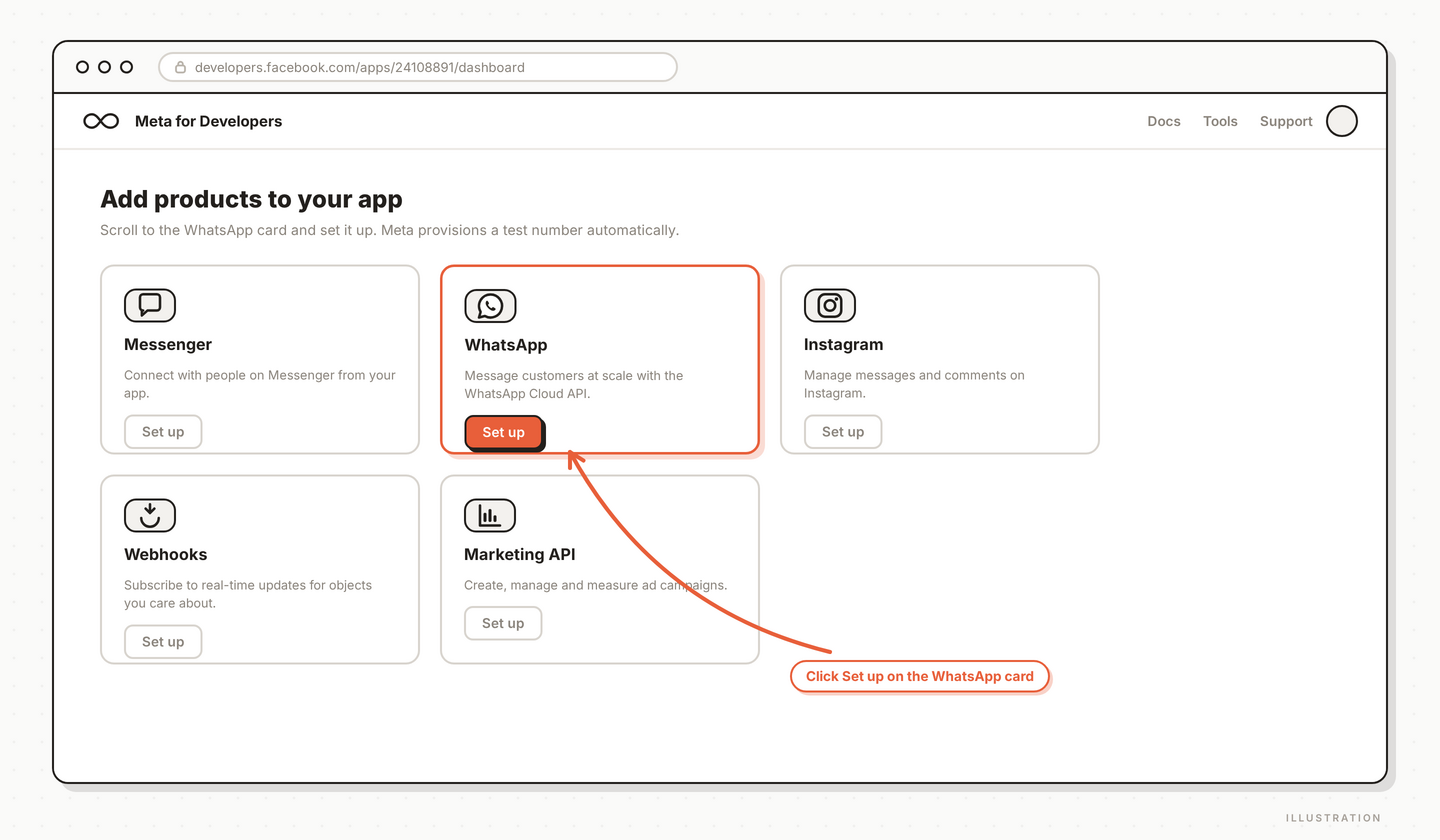
In the app dashboard, scroll to "Add products" and click Set Up on the WhatsApp card. Meta provisions a test number automatically so you can test before verifying your real number.
Step 3: Verify your business phone number
Under WhatsApp → Getting Started → Phone Numbers, click Add Phone Number. Enter the number you want to use for support. Meta sends a code via SMS or voice call — enter it to verify. The number cannot be actively used on a regular WhatsApp or Business App account.
Step 4: Generate a permanent access token
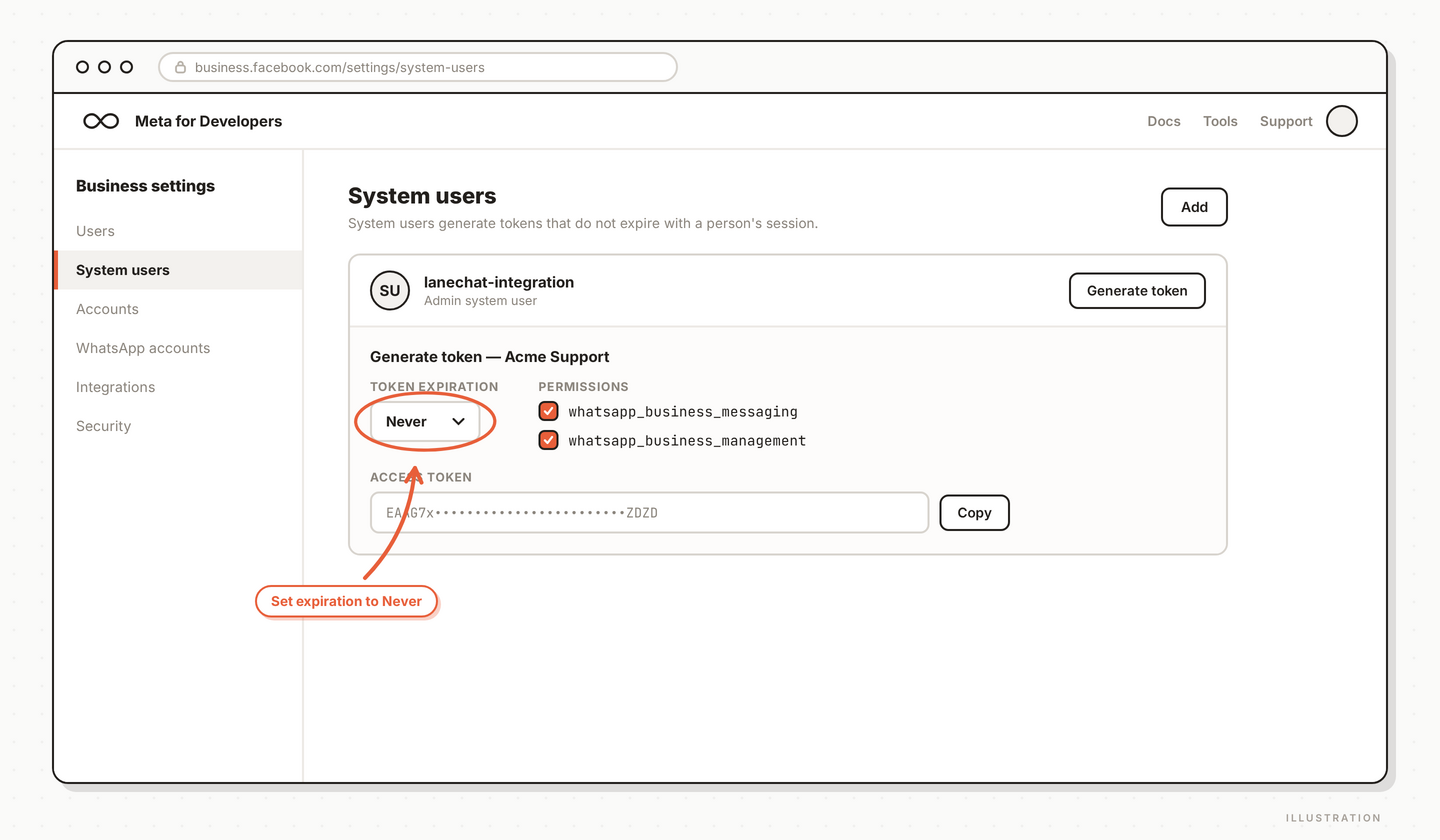
The default token expires in 24 hours, which is useless for production. Create a System User in Business Settings → Users → System Users, assign it to your WhatsApp Business Account with full permissions, then generate a token with whatsapp_business_messaging and whatsapp_business_management scopes. Set the expiration to Never.
Step 5: Paste credentials into Lane.Chat
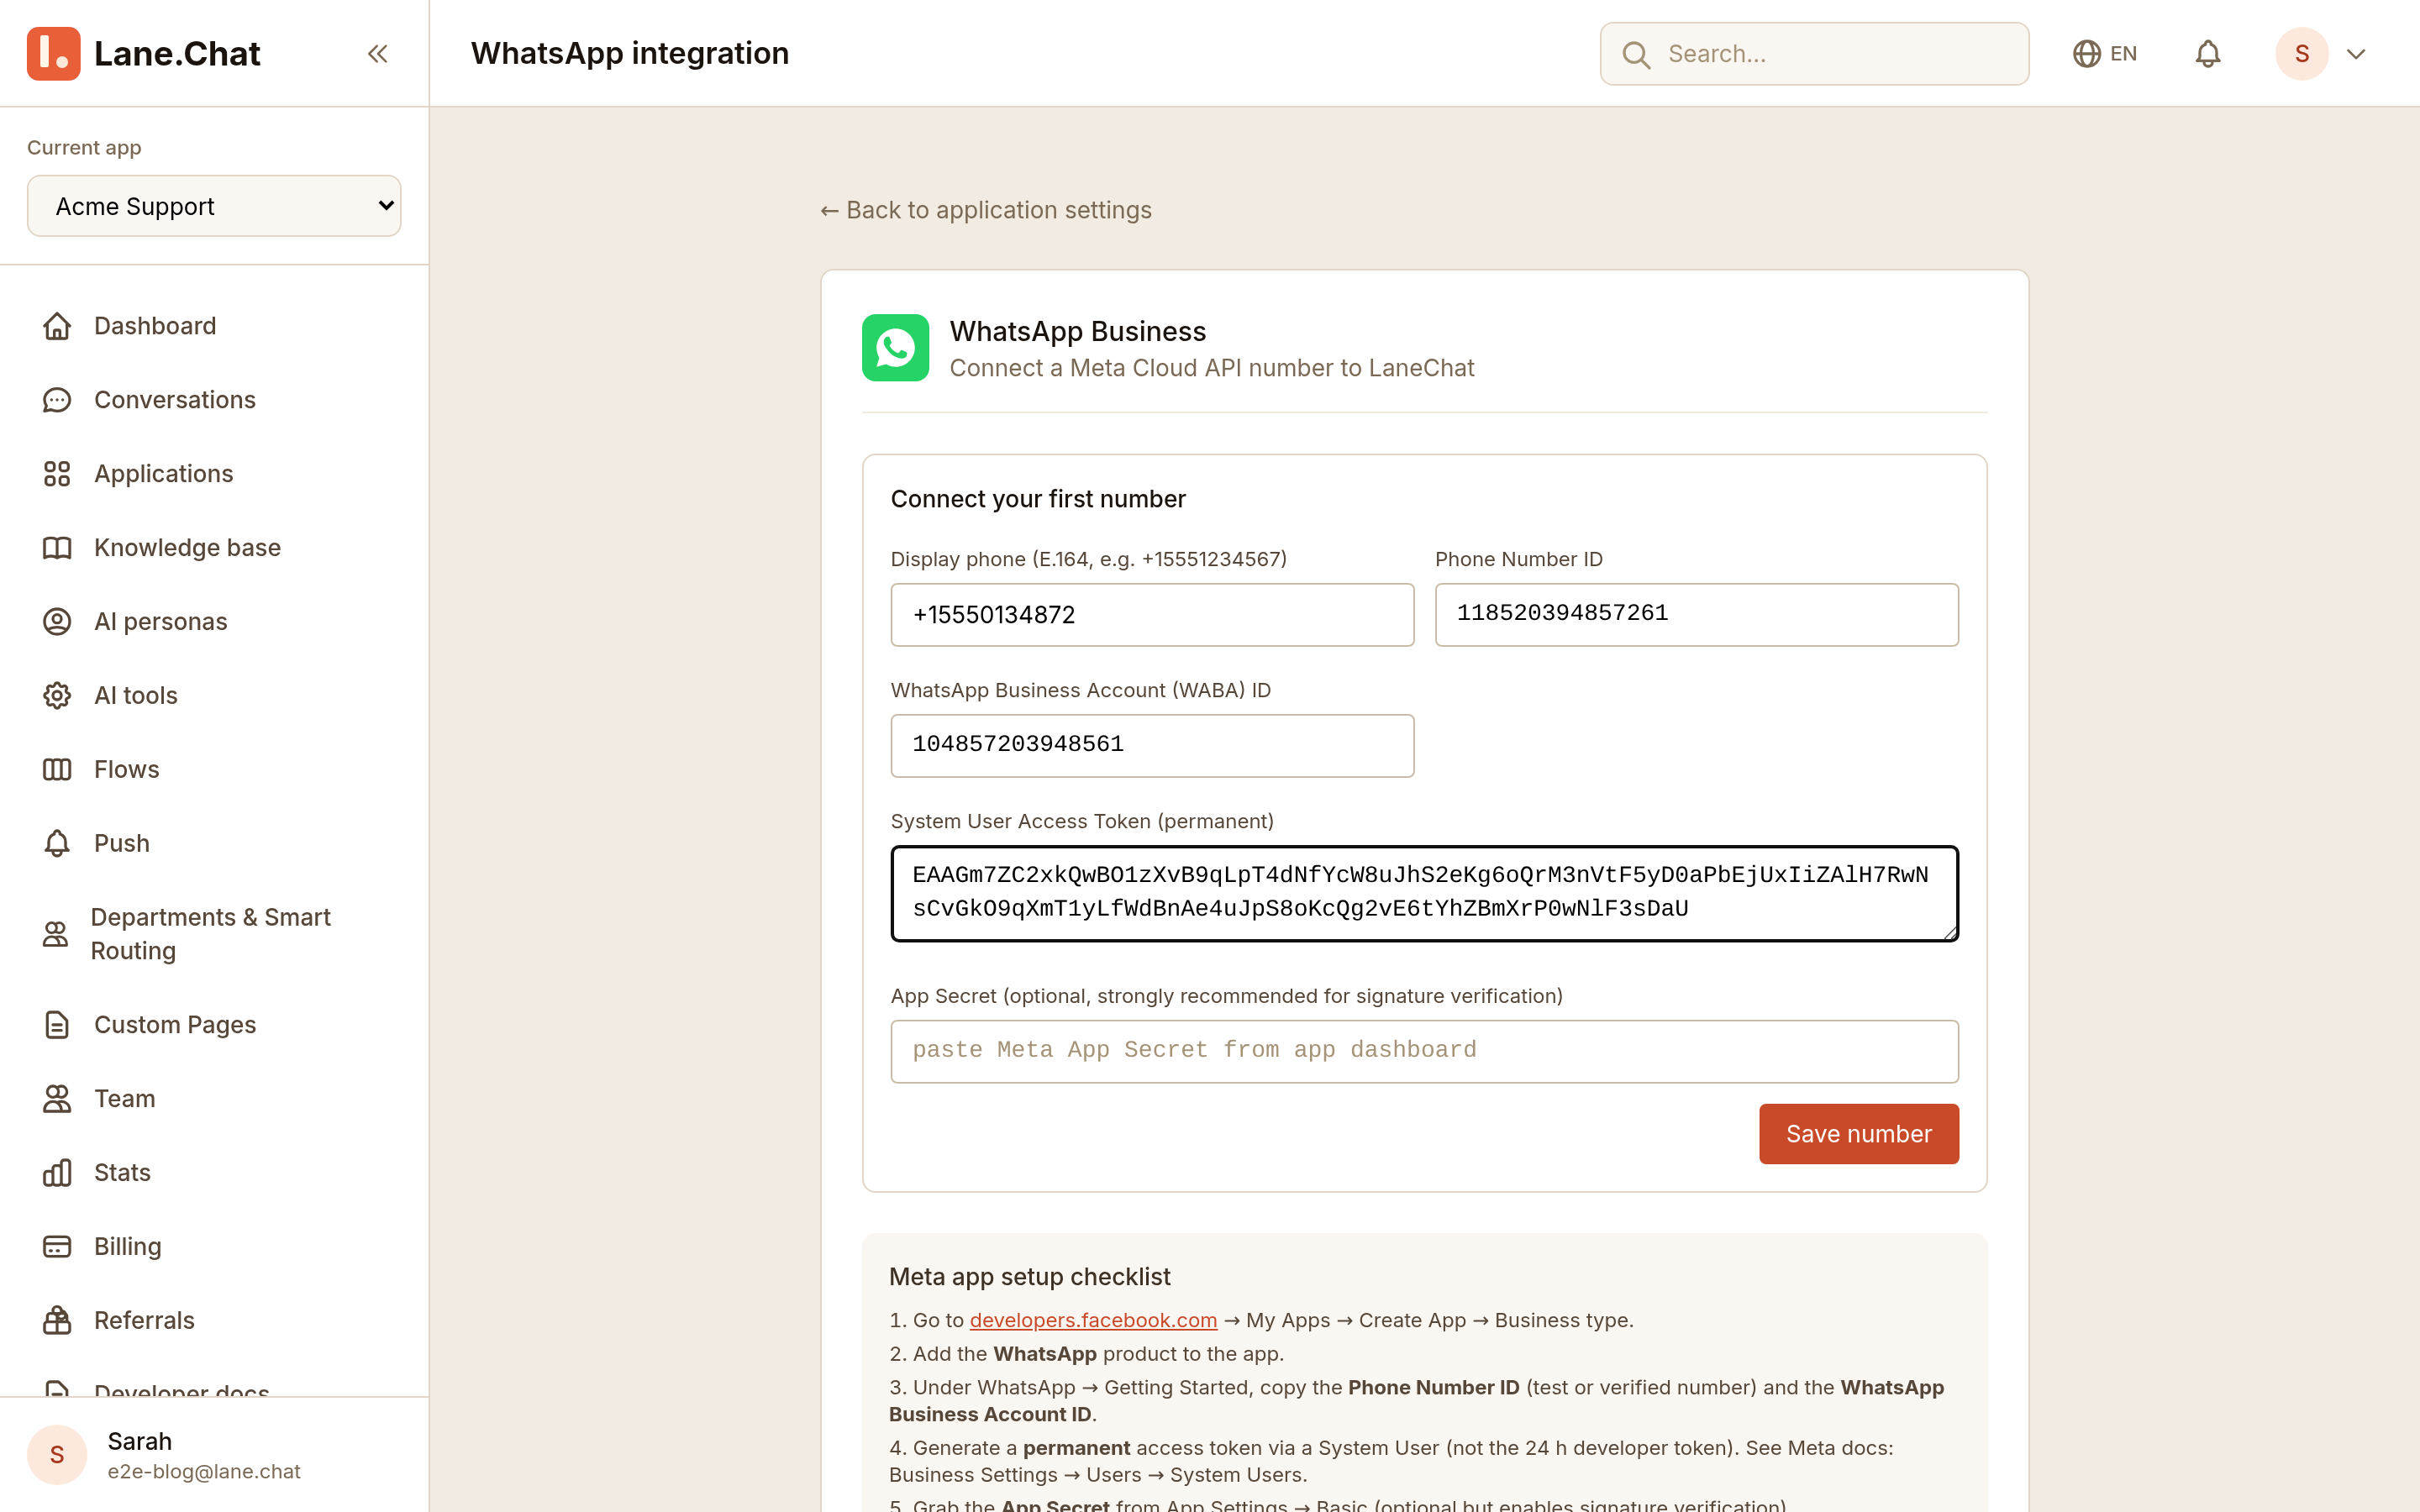
In the Lane.Chat dashboard, go to Channels → WhatsApp → Add Cloud API Number. Paste three values: Phone Number ID, WhatsApp Business Account ID, and the permanent token. Click Verify. Lane.Chat hits Meta's API to confirm all three.
Step 6: Configure the webhook
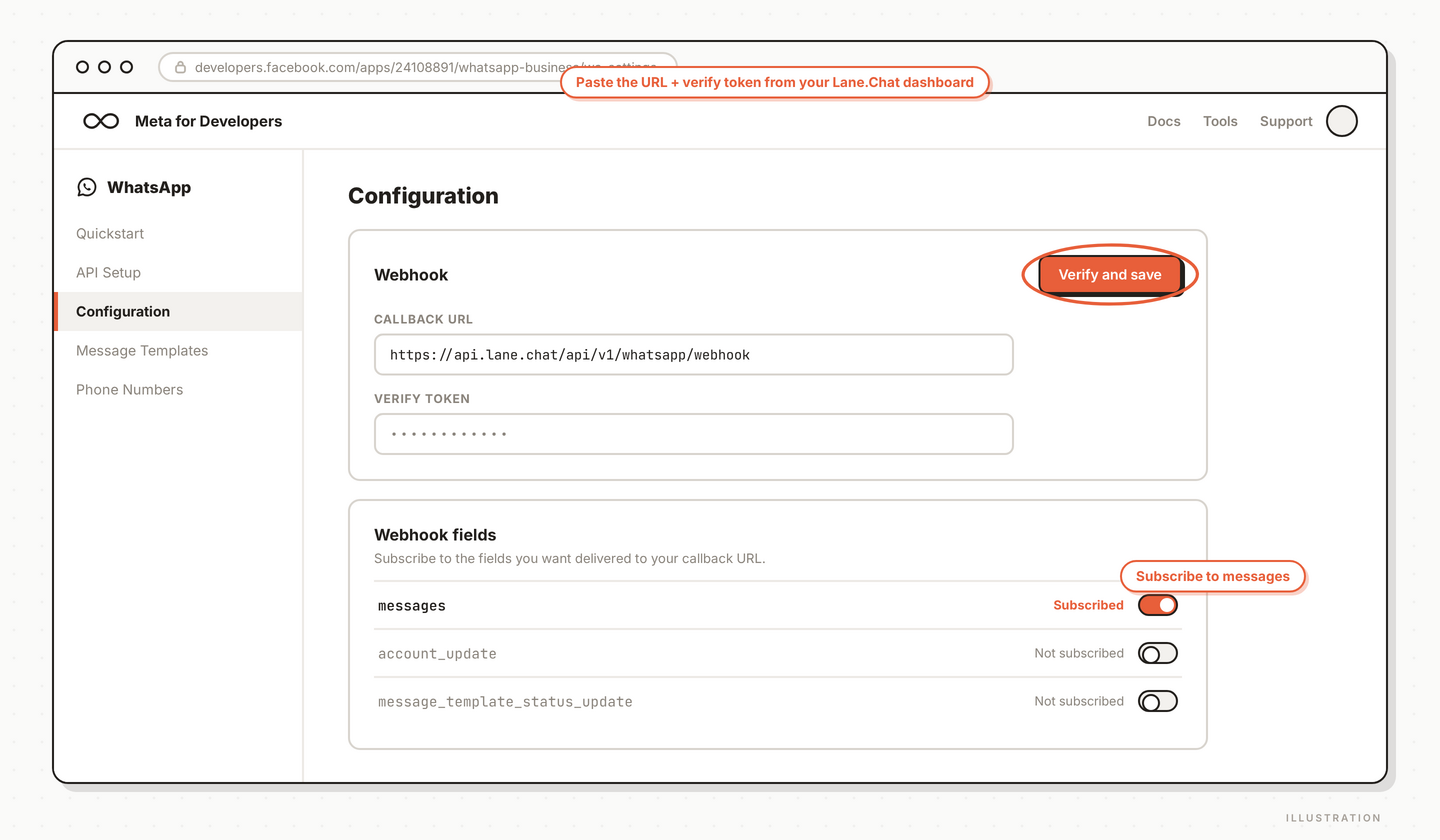
Back in the Meta App, go to WhatsApp → Configuration. Paste the webhook URL shown in the Lane.Chat dashboard and the verify token. Subscribe to the messages field. Meta pings the URL once to confirm it is reachable.
Step 7: Submit your first template
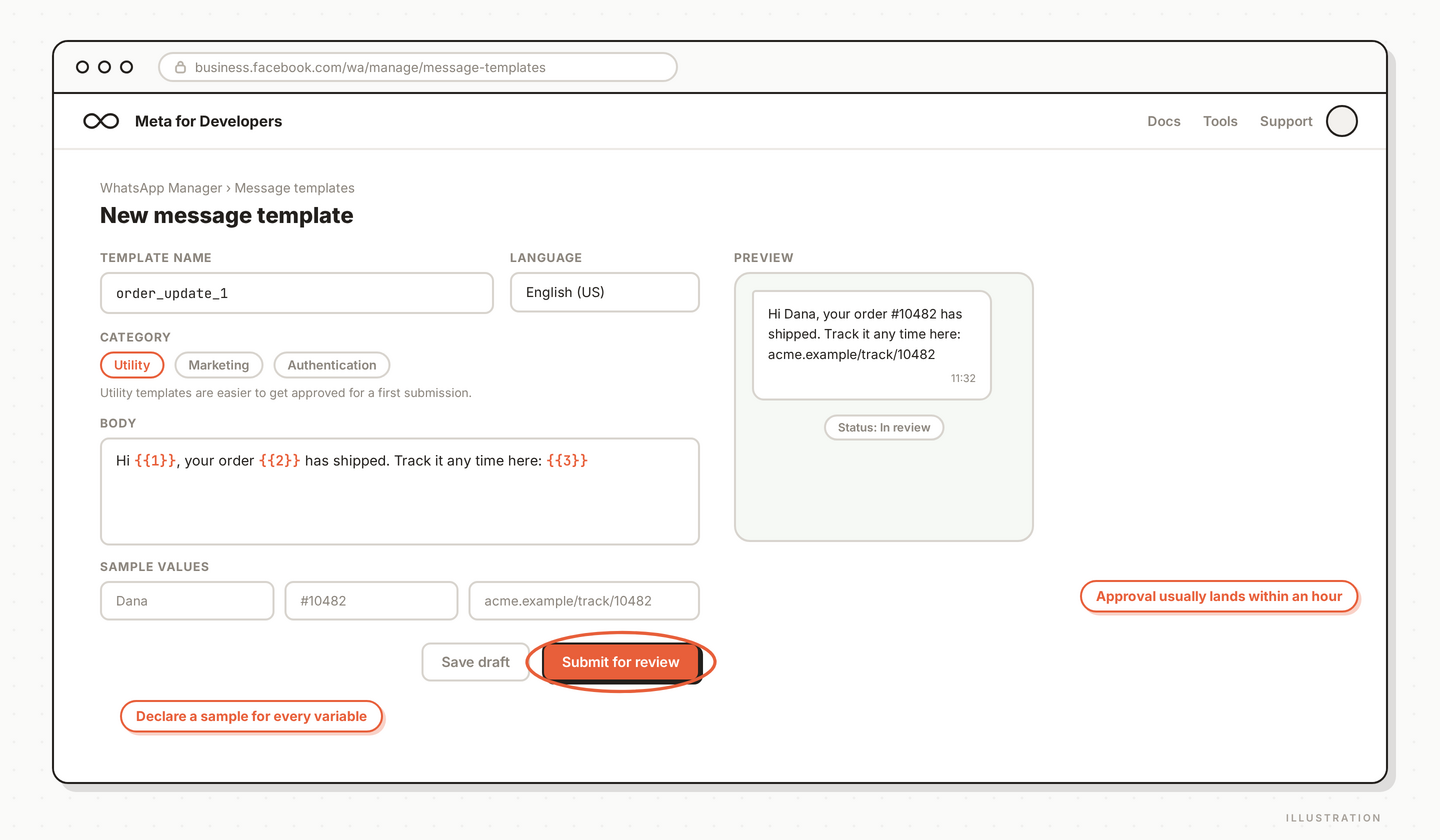
Still in Meta App → WhatsApp → Message Templates, click Create Template. Pick a category — Utility is easier to get approved than Marketing for a first submission. Write your copy, declare variable examples, submit. Approval usually lands within an hour.
What to do next
- Send a test message inside the 24-hour window to confirm the pipe works end to end
- Add more templates for order confirmations, shipping updates, and the like
- Watch your quality rating in WhatsApp Manager for the first two weeks
截图清单 / Screenshots Checklist
01-create-meta-app.png— Meta developers.facebook.com app creation wizard02-add-whatsapp-product.png— Adding the WhatsApp product to your app04-permanent-token.png— System User with permanent token generated05-paste-credentials.png— Lane.Chat dashboard accepting Phone Number ID, WABA ID, token06-webhook-config.png— Webhook URL and verify token configured in Meta App07-template-submit.png— Message template submission form