The Lane.Chat Web Widget is a single JS snippet. Paste it into your site and a chat launcher shows up in the corner. This walks you through Shopify and a generic custom site — installing, styling, testing.
Step 1: Grab the widget code from the console
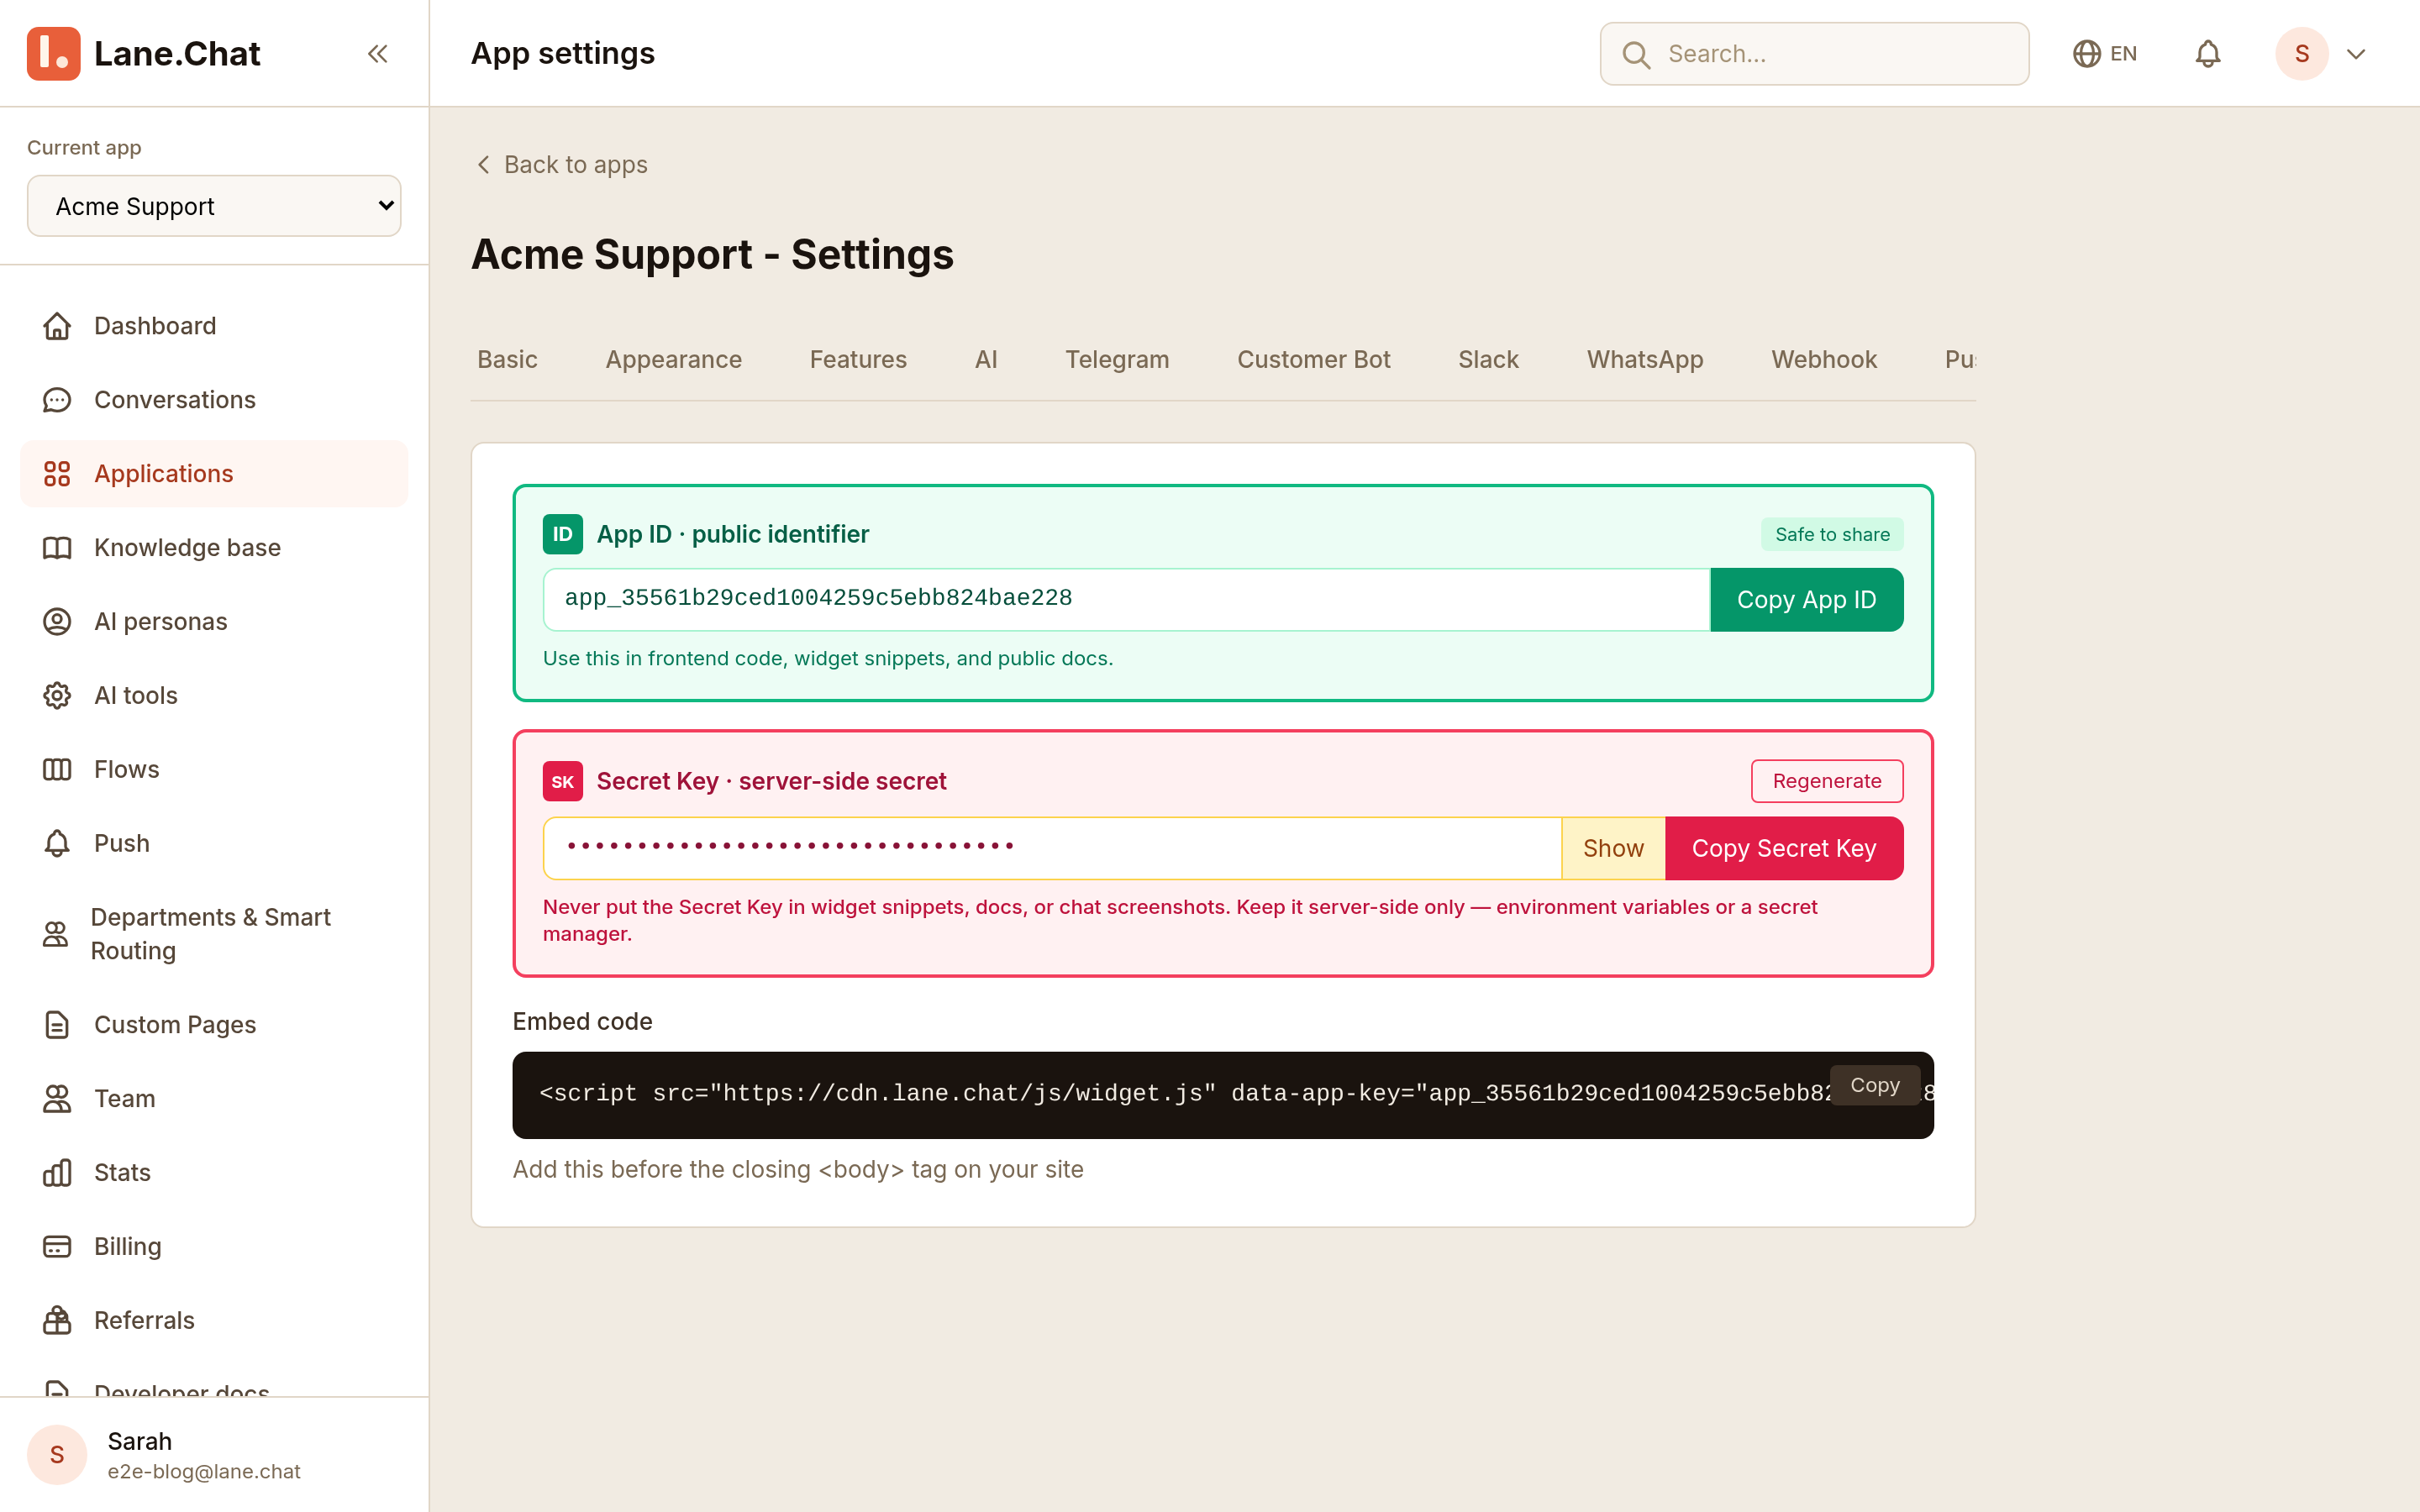
Log into the Lane.Chat console. Left sidebar, Channels → Web Widget. First time? Click New widget, name it (e.g. shopify-main-store), save.
You get a JS snippet:
<script async src="https://cdn.lane.chat/widget.js"
  data-lane-id="wgt_xxxxxxxxxxxx"></script>
Copy it. You'll paste it into your site next.
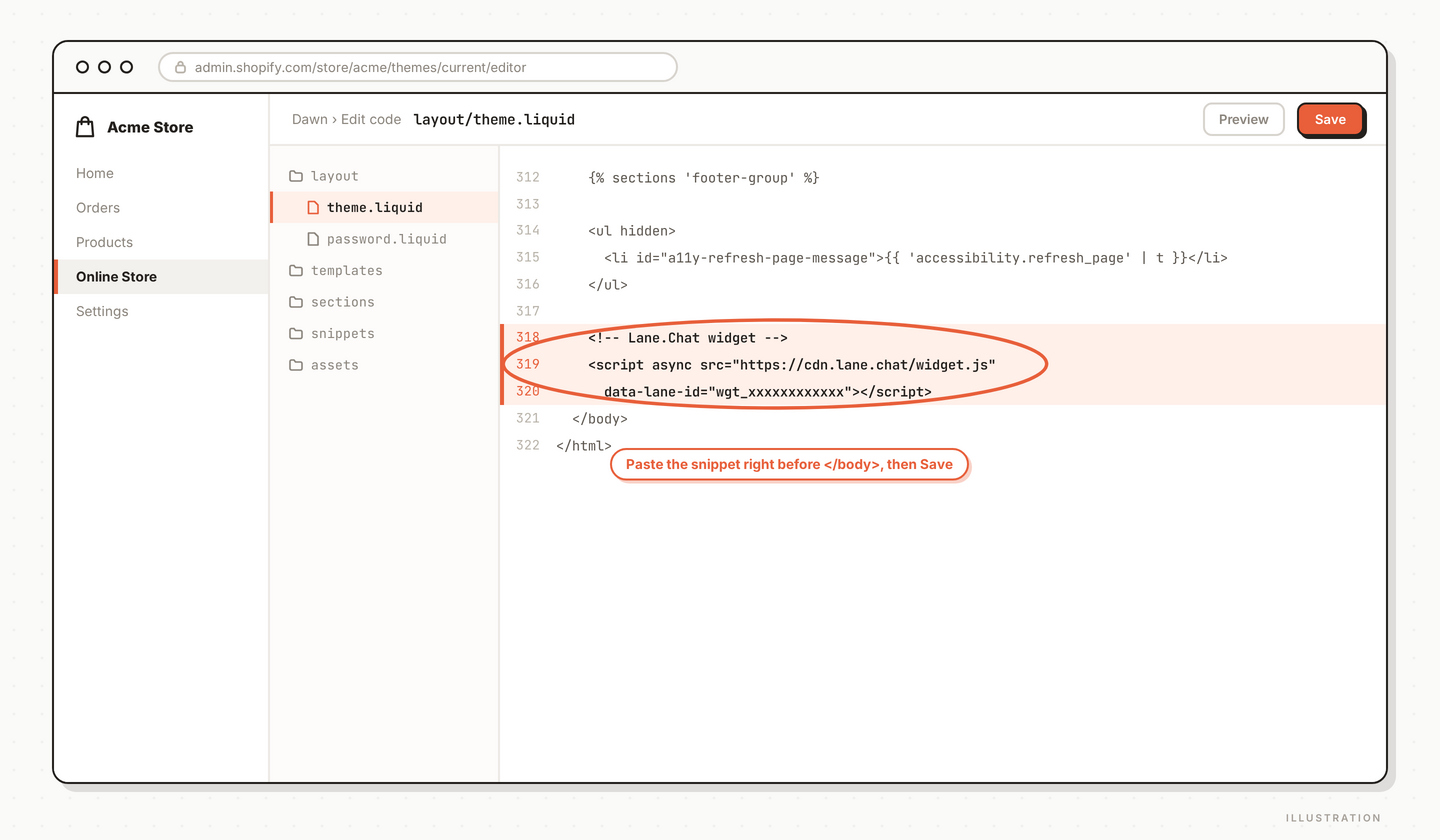
Step 2: Paste into Shopify theme.liquid
On Shopify:
- Admin → Online Store → Themes
- Find your active theme, click Actions → Edit code
- In the file tree, open
layout/theme.liquid - Paste the snippet on the line right before
</head> - Save
Custom site (Next.js, WordPress, static)? Same idea — find your global <head>, drop the snippet in. For WordPress we'd recommend an "Insert Headers and Footers" plugin rather than editing theme files directly.
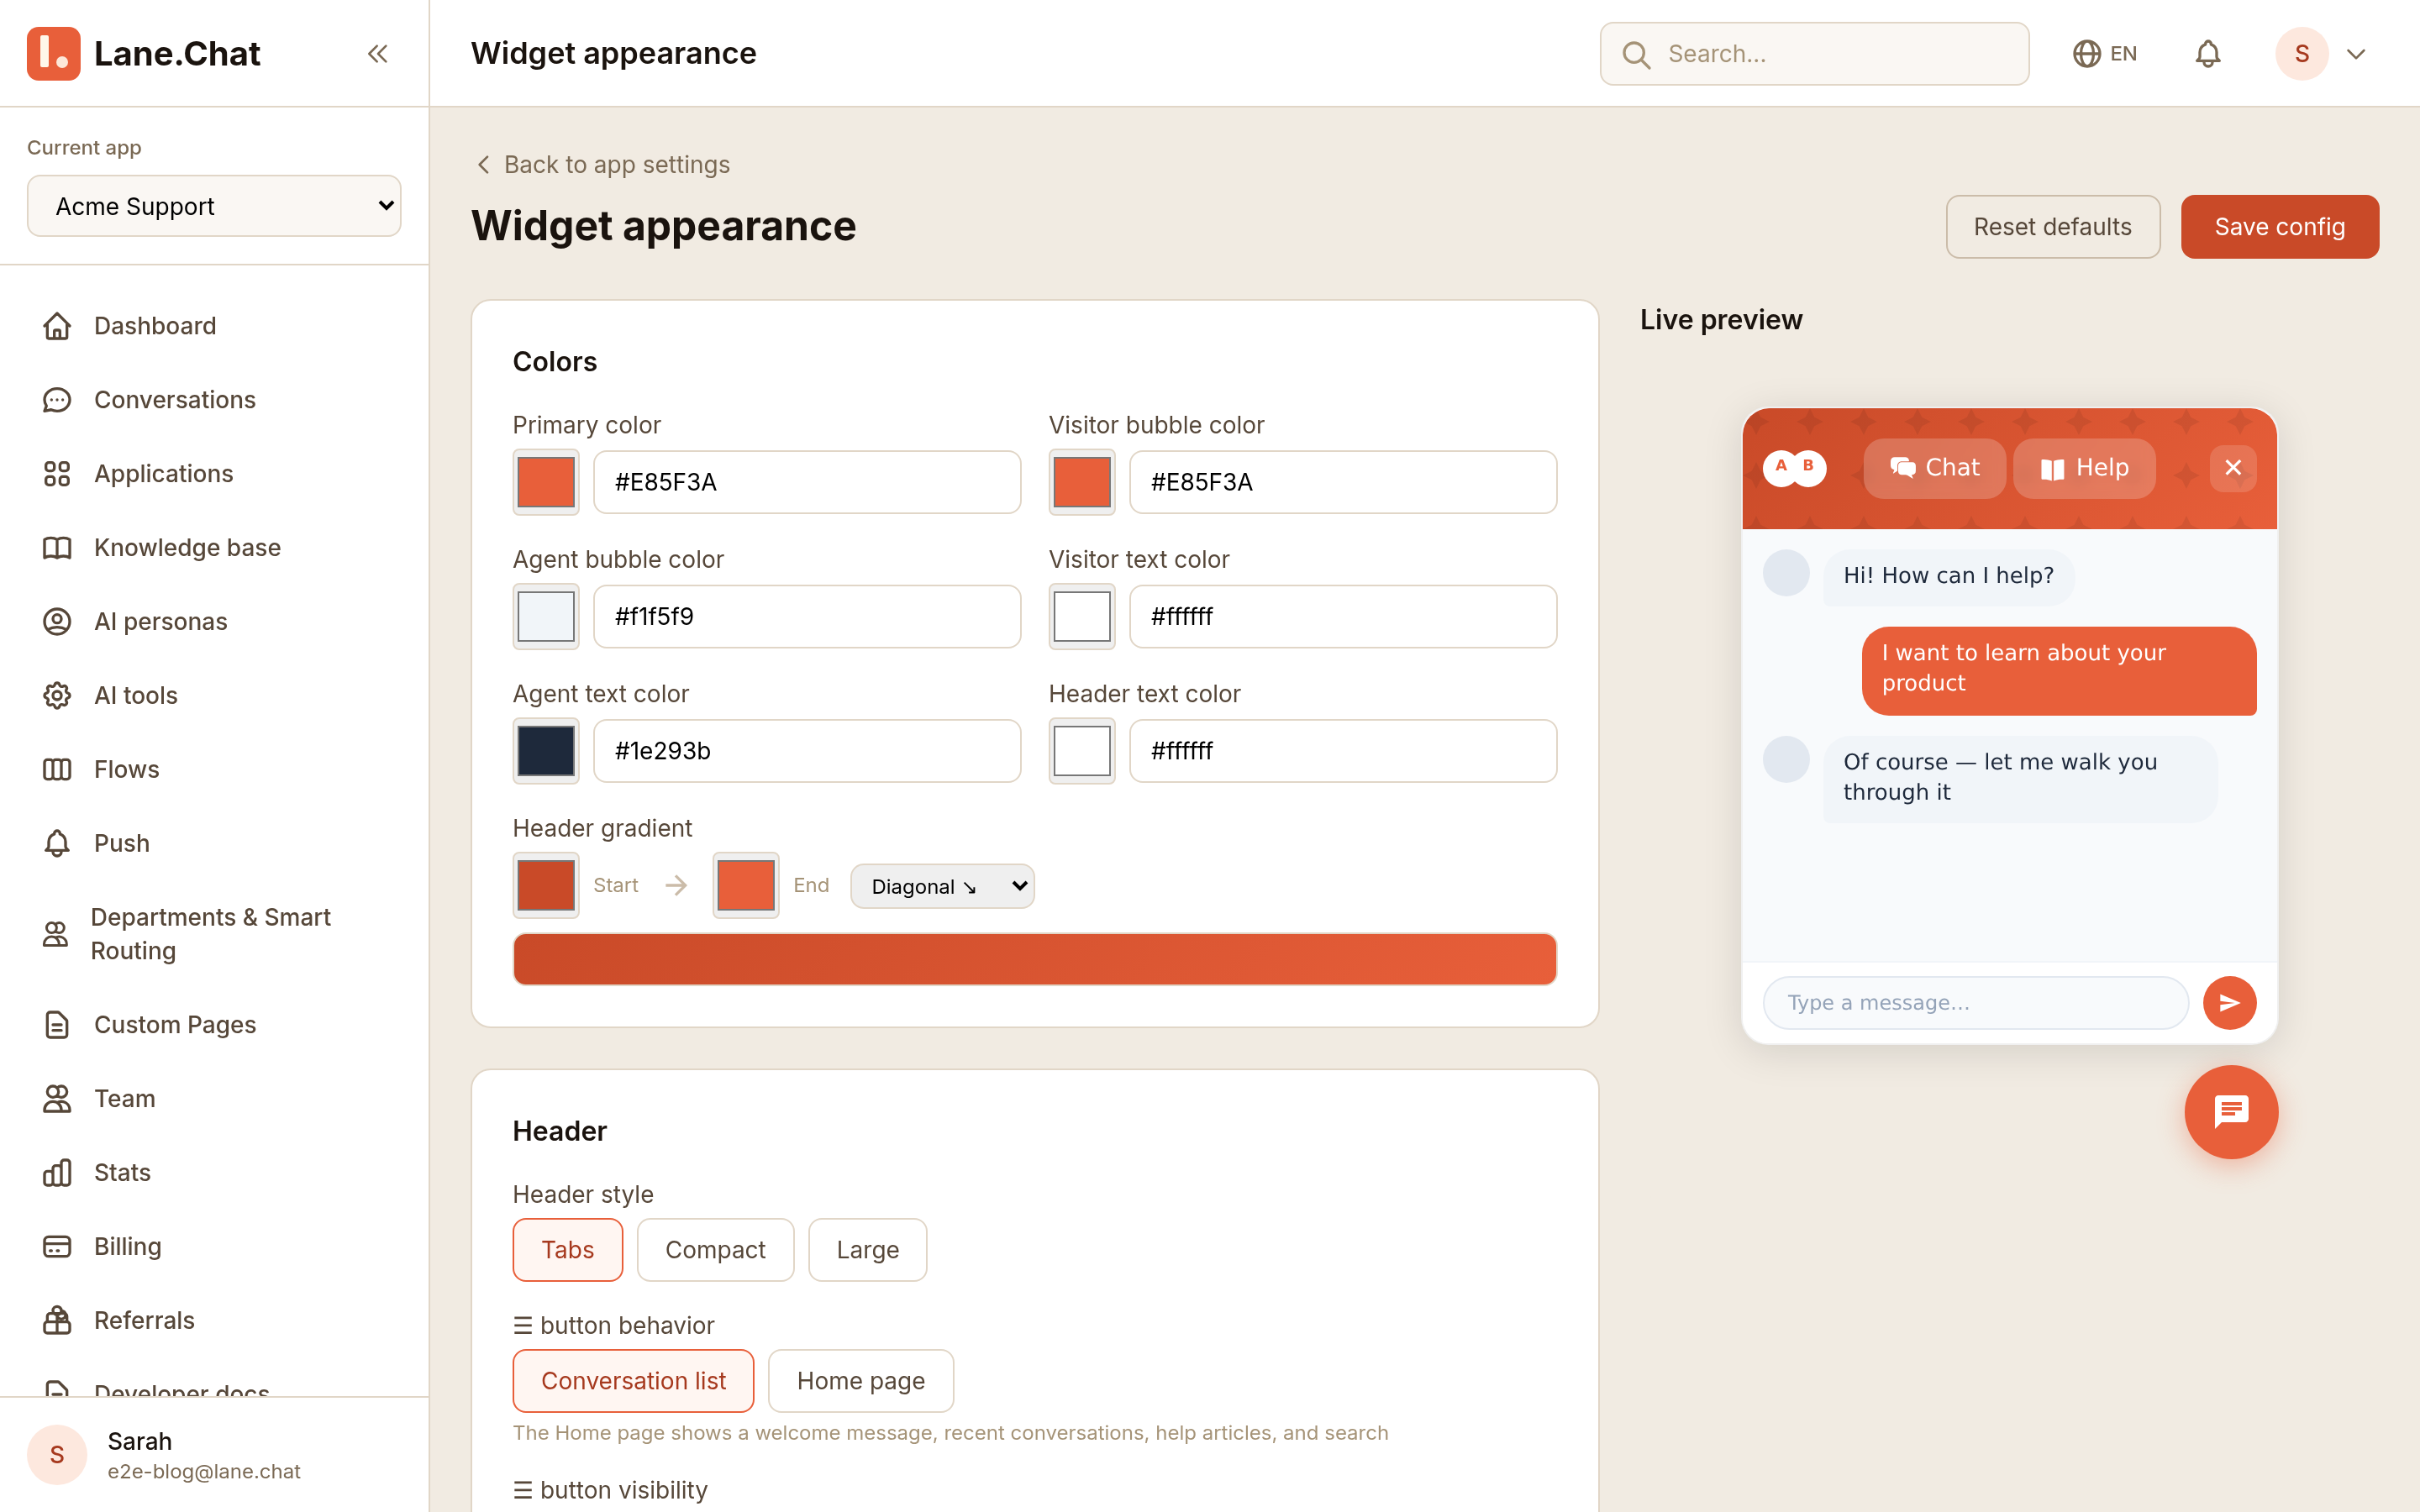
Step 3: Style the launcher
Back in the console widget page, open the Appearance tab:
- Primary color — match your brand
- Launcher position — bottom-right or bottom-left
- Welcome message — the tooltip that pops first
- Avatar — upload one or use the default
Save. Changes apply live — no need to touch site code again.
Step 4: Link it to an app
The widget needs a backing Lane.Chat app (your business entity — carries AI config, knowledge base, agent team).
In the widget settings, find Linked app and pick one from the dropdown. No app yet? Head to Apps → New first.
Once linked, the widget inherits that app's AI behavior: model, knowledge base, escalation rules, all of it.
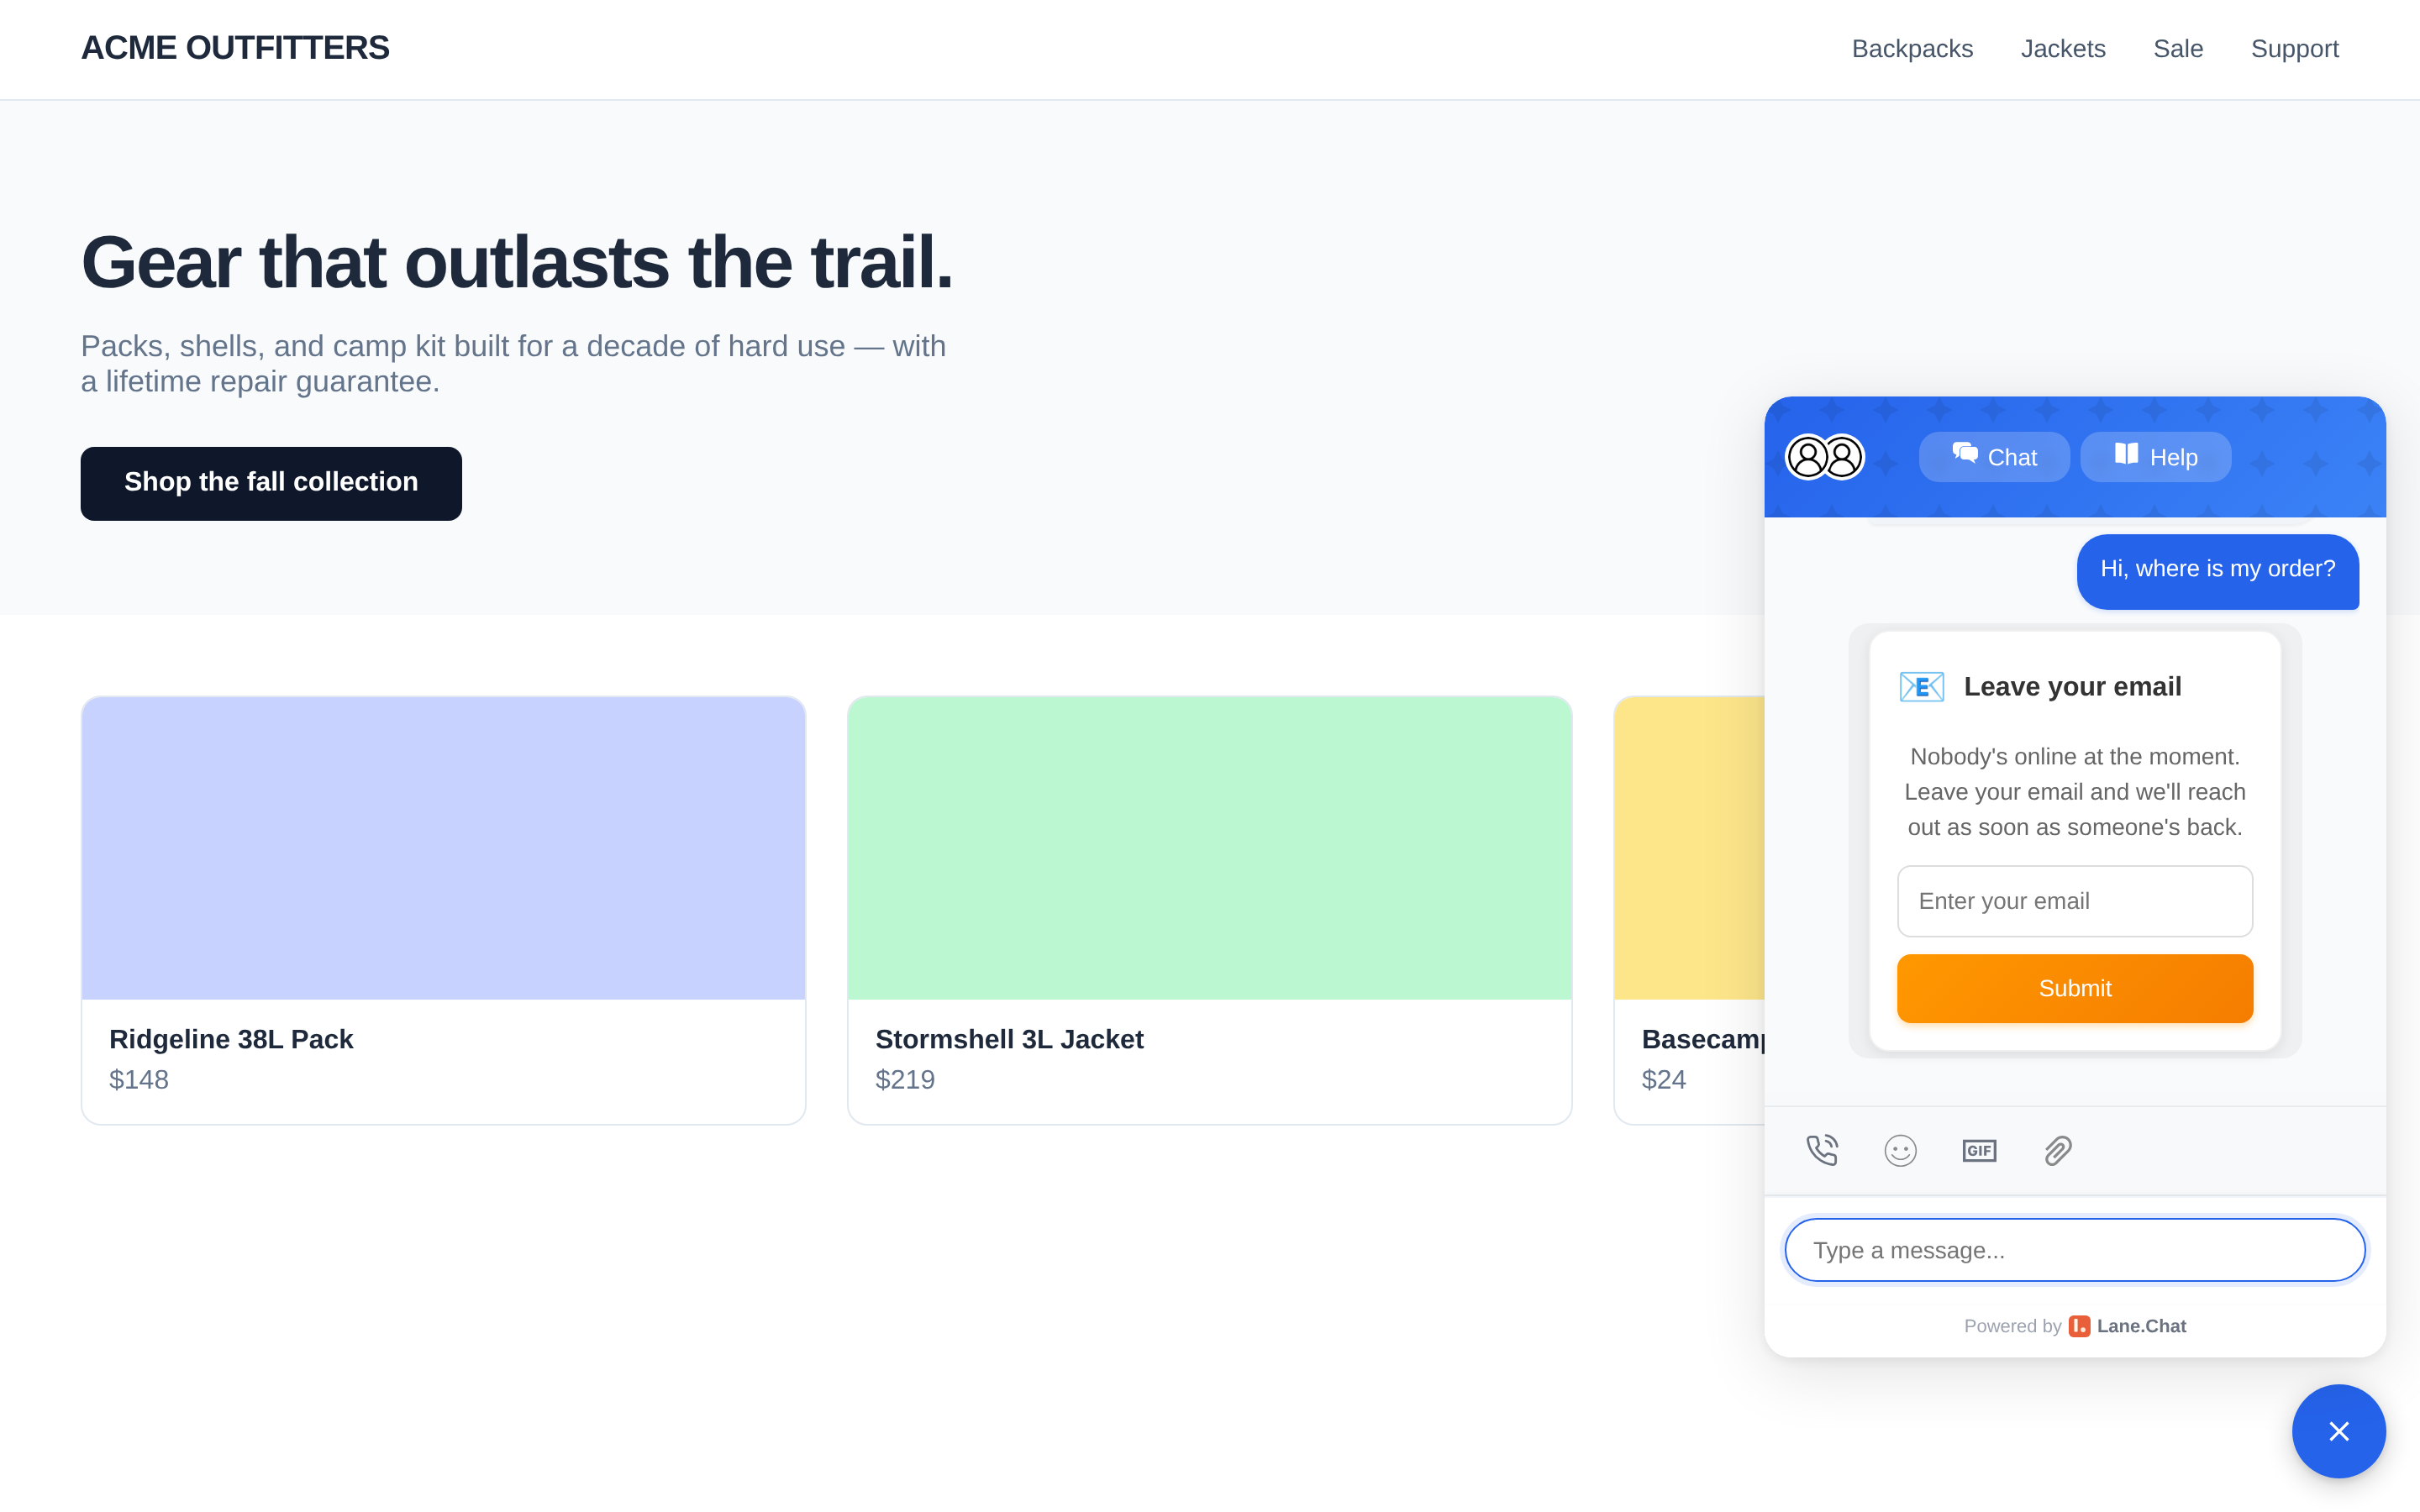
Step 5: Test
Open your site (Shopify: open your storefront; custom site: the page you edited). Launcher should be in the corner. Click it, send a test message.
At the same time, open the console's Conversations page. Your test message should appear instantly.
If the launcher doesn't show up, it's caching 90% of the time. Shopify: save the theme once to bust the cache. Custom site: hard refresh or open in an incognito window.
Step 6: Pre-launch checks
- Mobile: launcher renders correctly on iOS Safari and Android Chrome
- Checkout / high-conversion pages: widget doesn't cover a CTA button. If it does, move the launcher position, or hide the widget on specific URLs from the console
- End-to-end: anonymous visitor sends a message, leaves email/Telegram, confirm the user attribution in the console shows the source page
Screenshots Checklist
01-console-widget-snippet.png— Console Web Widget page showing the generated JS snippet02-shopify-theme-liquid.png— Shopify theme.liquid editor, cursor before</head>03-widget-appearance-config.png— Widget appearance panel (color, position, welcome)04-widget-live-test.png— Launcher open on site with console conversation receiving the test message